Master the art of photography
-
Certified
results -
All types
of camera -
Instant
feedback -
Flexible
booking -
Interactive
learning -
Professional
teachers
About us
- Anyone can find their perfect photography course or request a custom one.
- We have already shared our passion to photography with the 30,000 clients from all over the world.
- Founded in 2011, THE PHOTO ACADEMY is the leading international photography learning network.
- The innovative teaching approach assures the skill improvement after the very first class!
- Our courses are taughts by 200+ professional photographers with years of experiences and diverse cultural backgrounds.
- We operate in 60+ cities in 17+ countries around the globe.
How it works
Choose a Course That Interests You
Book Your Preferred Time and Date
Receive Detailed Course Information via Email
Enjoy an Interactive Learning Experience
Beginner's Guide to Photography Courses
Although there is a lot to learn and remember, photography is not as complicated as you may think. Once you’ve understood the rules and techniques, it's easy to start shooting fantastic photographs. Famous photographers aren’t born great; they dedicate time to learning and practising in order to hone their craft. In fact, if you are just starting out, it’s better to invest in learning rather than fancy, expensive equipment.
Mastering the basics, knowing how to control your camera and understanding the technical terms are the most important steps in your journey.
Education is king!
Beginner's Guide to Photography Courses
Education is king!
⬇So with that in mind, let’s crack
on!⬇
Composition
The (famous) rule of thirds.
Simply place the subject, or another striking element of the image, in one third of the frame. This method of composition makes the photograph more dynamic.
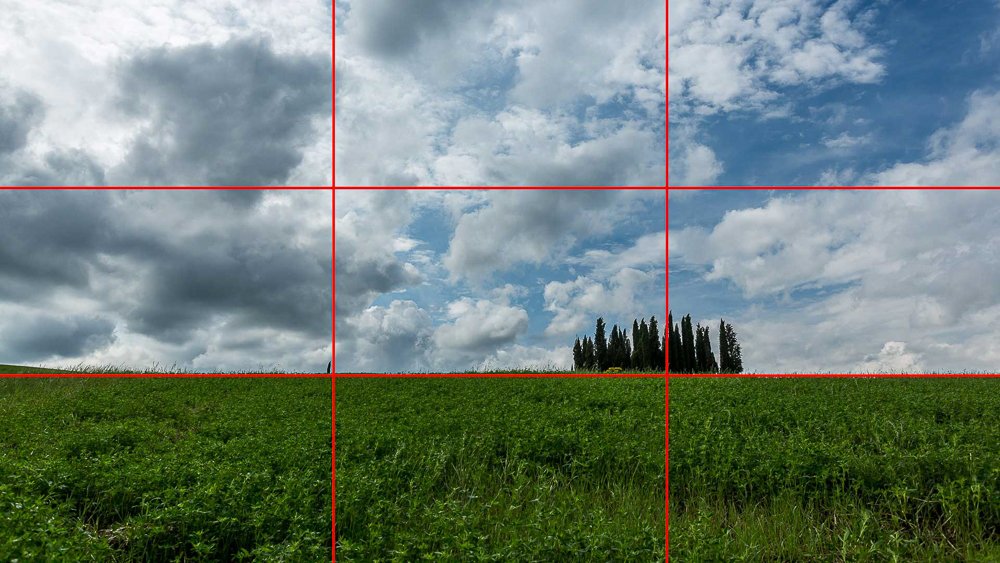 A very strict example of the use of the rule of thirds.
Lines of force.
The lines can be horizontal, oblique or curved. Each type of line leaves a different impression on the reader of the image: "dynamism" for oblique lines; "calm and stability" for horizontal lines; "softness" for curved lines.
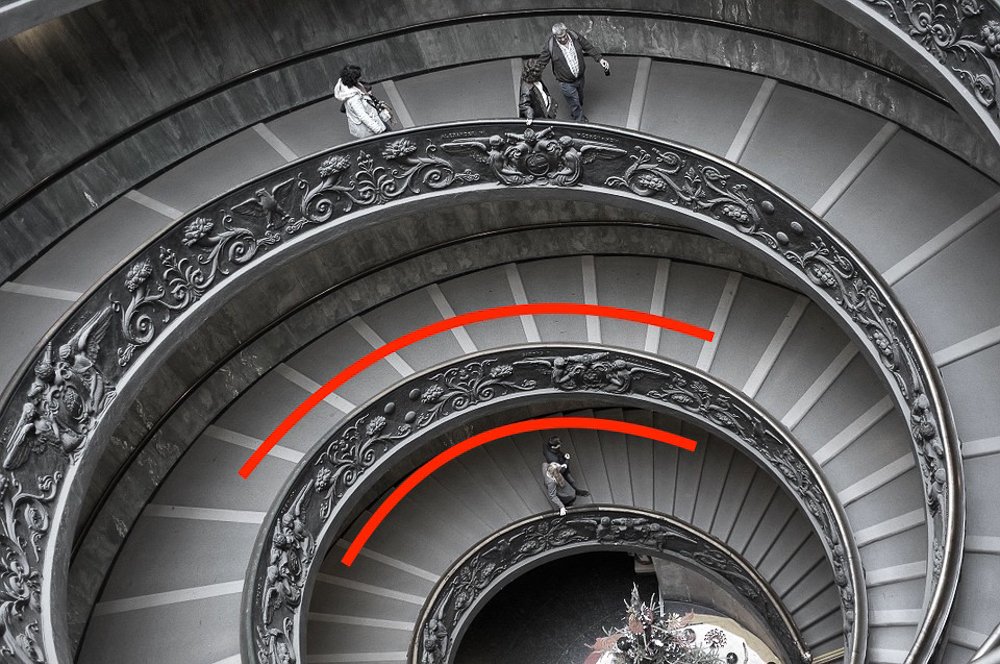 Example of lines of force (1)
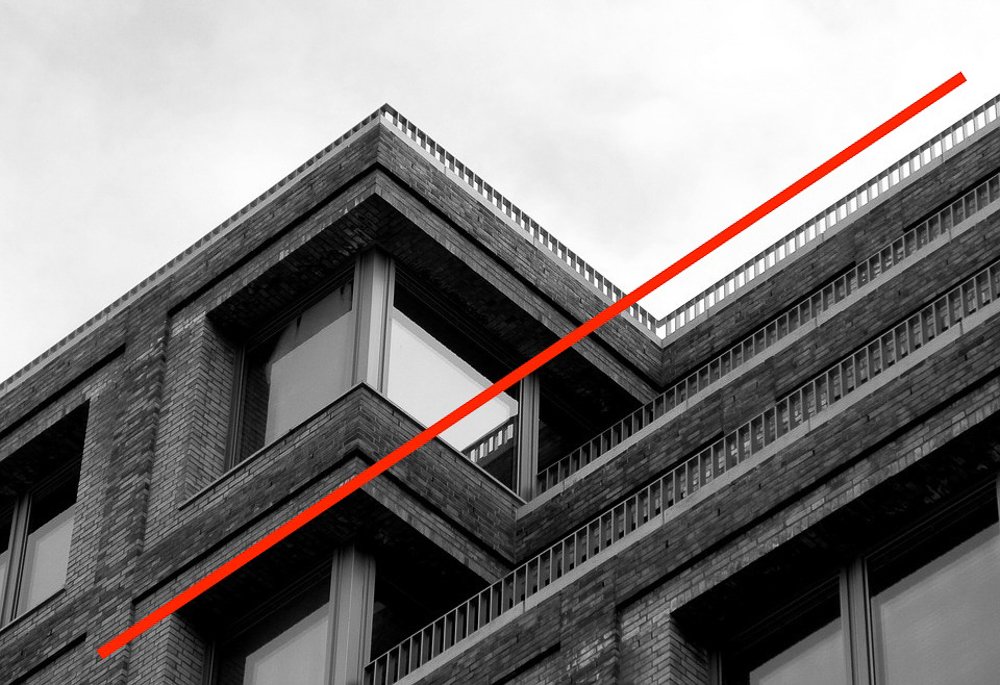 Example of lines of force (2)
The subject's environment.
A minimalist setting or a blurred, uncluttered background will highlight the main subject of the image. On the other hand, a busy, sharp background will help blend the subject into the composition, making it less obvious.
 A clean but uncluttered background; the subject is highlighted.
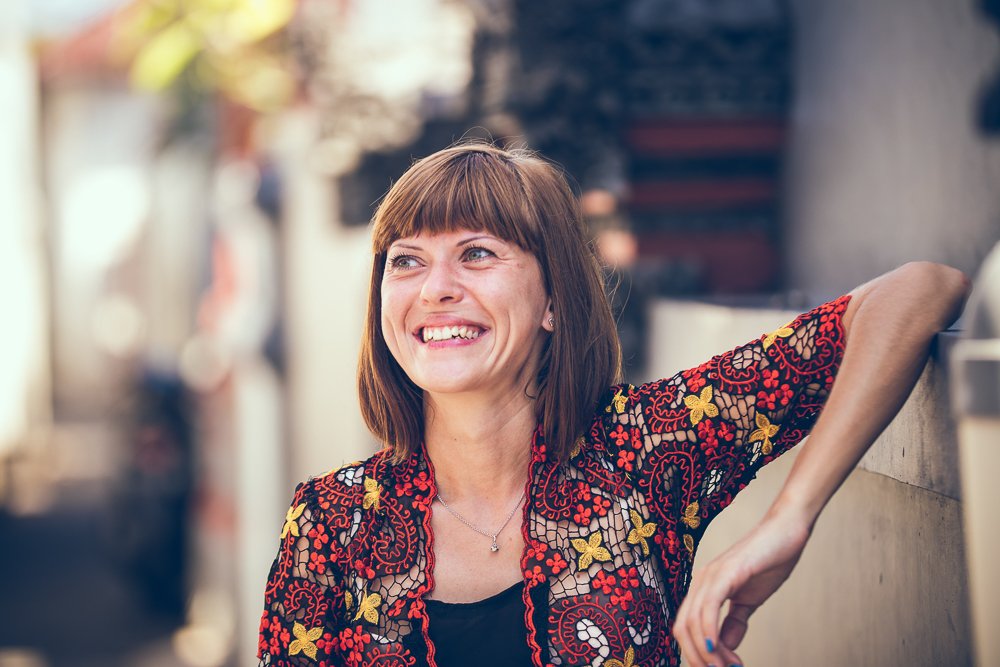 A busy but blurred background; the subject is highlighted.
Look for natural frames.
This is not one of the "big rules" of composition, but it is extremely effective nonetheless! It simply consists of framing your subject within a frame present in your environment. This trick, in addition to creating a particular aesthetic, will also highlight the subject. Here are two examples:
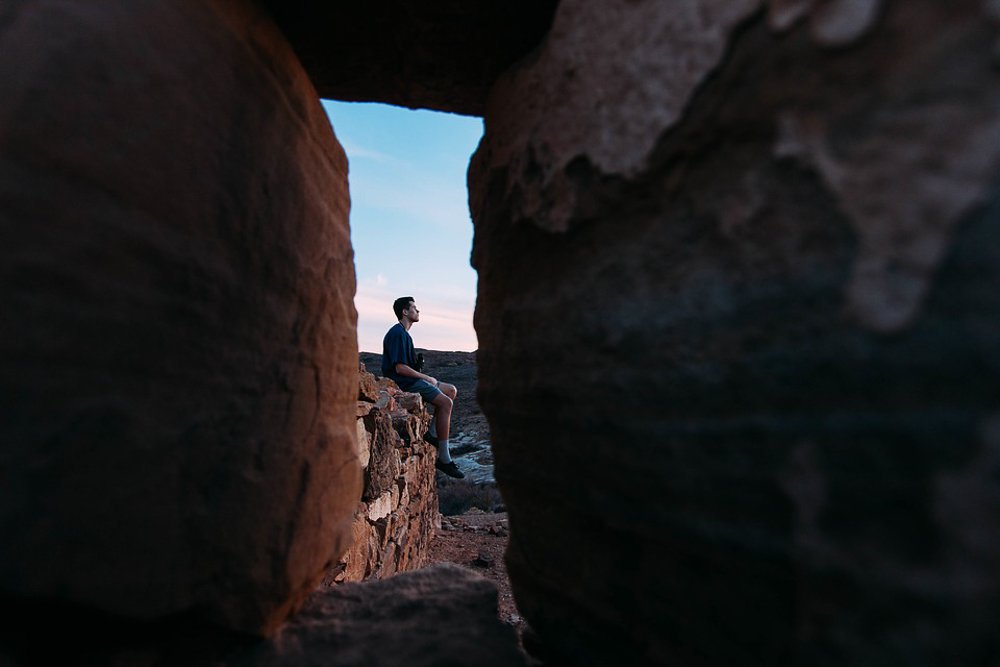 Example of natural frame (1)
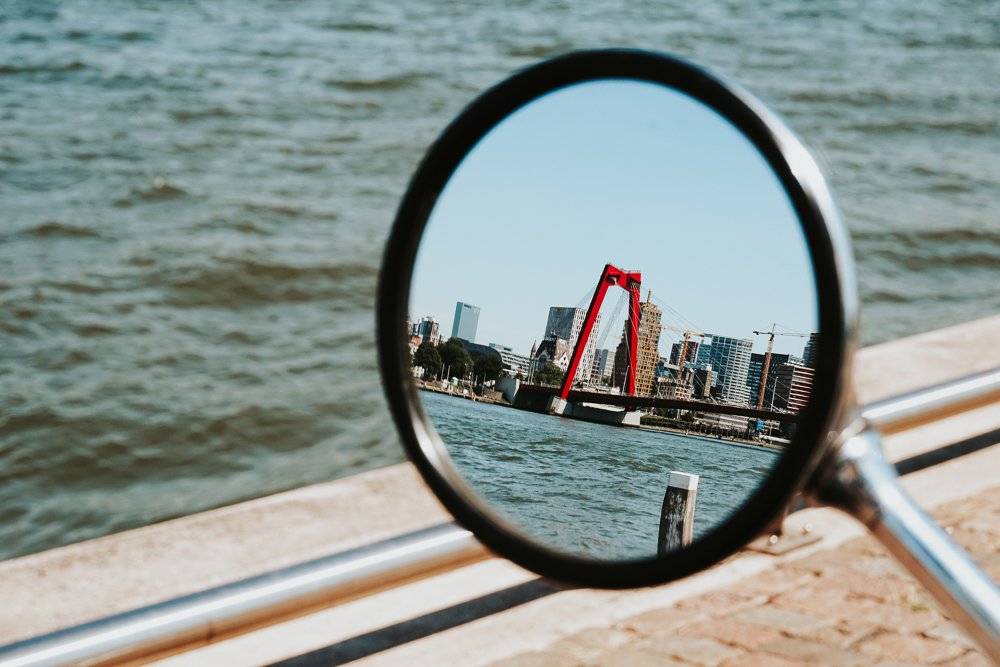 Example of natural frame (2)
Check out our courses!
For more creative ideas and tips on how to frame your images, head to our photography course Composition for All
Light and focus
Here are some examples of light that make for aesthetic photographs.
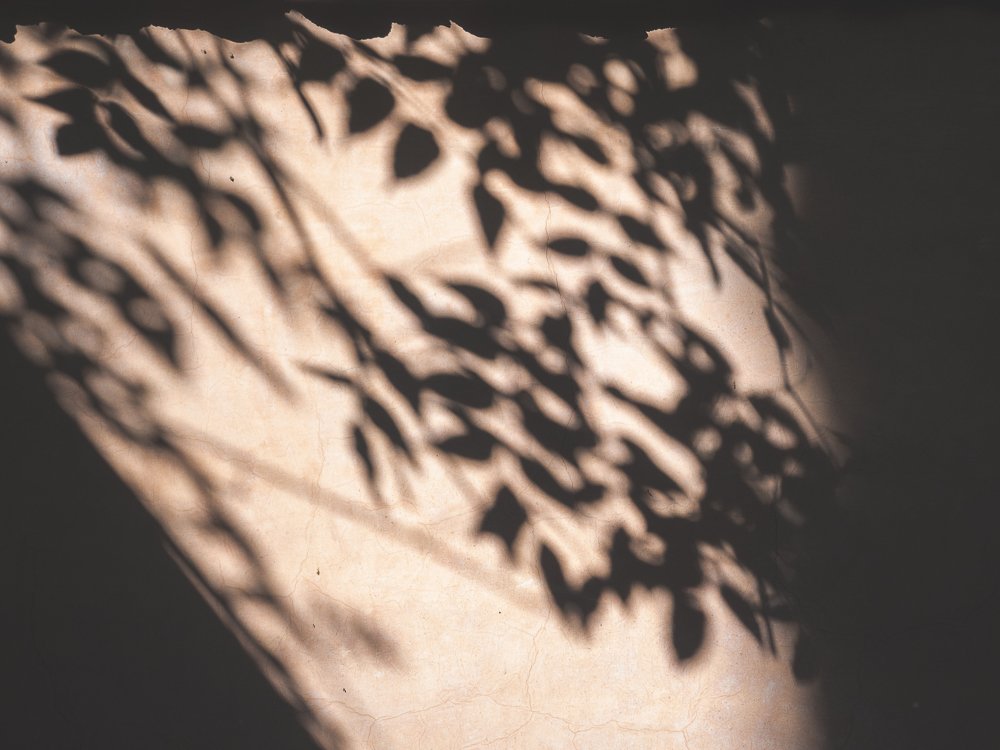 Shadows cast on a surface. Particular attention should be paid to the shadows of dusk and
dawn.
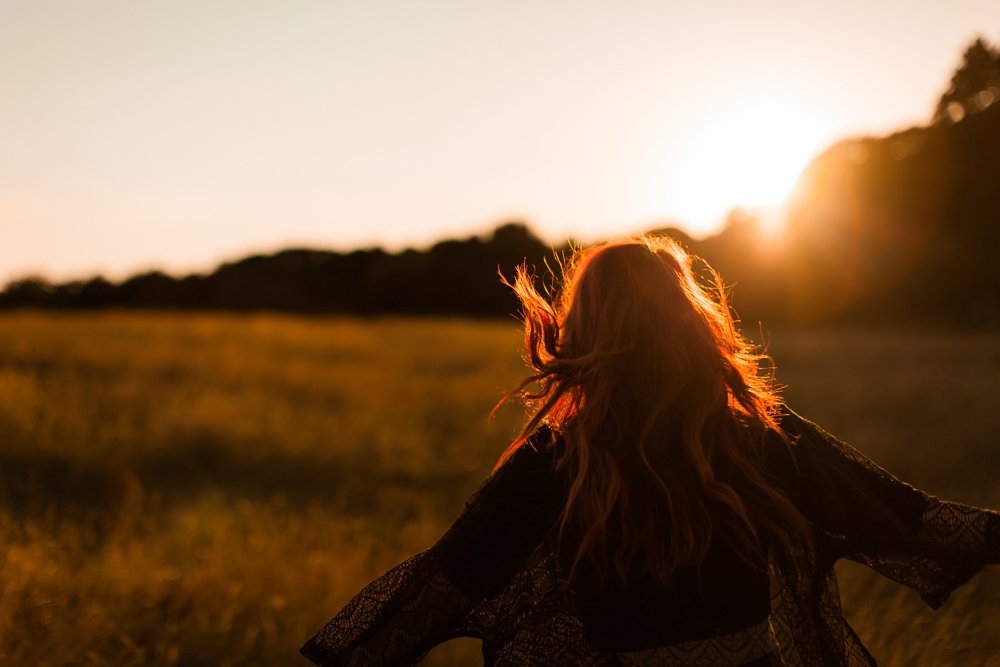 A subject photographed against the light, forming a bright fringe around the
character.
 A bright element in a much darker environment.
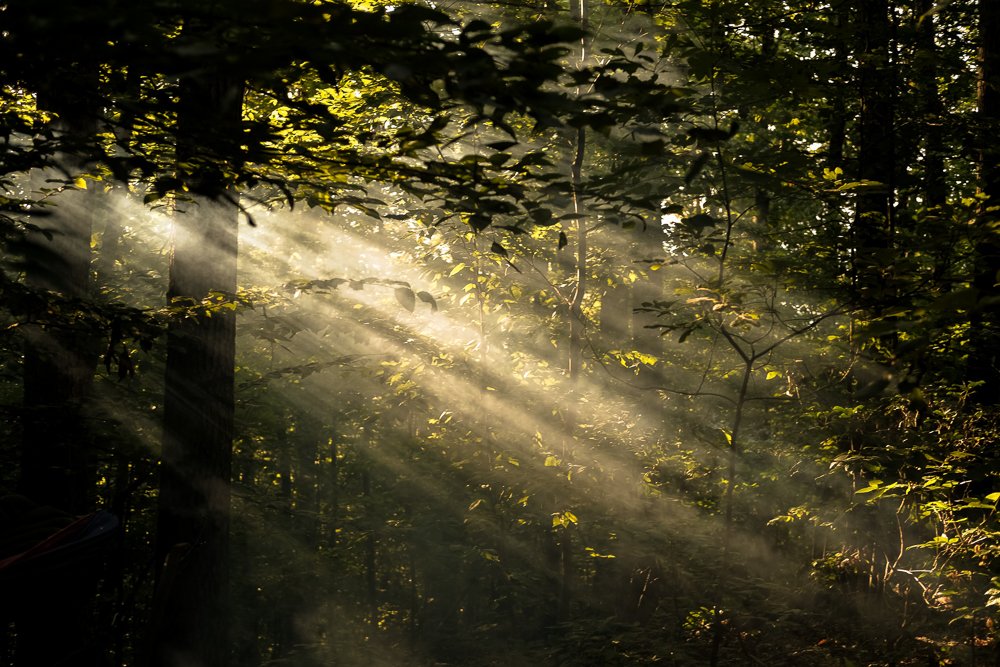 Filtered light in a dusty or humid environment (water vapour).
Check out our courses!
Light is such a vast subject. If you are eager to learn more, sign up to our photography course Light and Focus
Camera settings
✅ JPEG vs RAW
JPEG and RAW are the types of files used to save your photo. JPEG is a compressed file that leaves little room for retouching the exposure. RAW will offer a raw, uncompressed image, allowing for more in-depth retouching of the shot. Go to your camera settings to choose between the two.
✅ White balance
Don’t neglect the white balance setting! This determines the dominant hue, or its absence, in your image.Does a yellowish or bluish image sound familiar to you? This is the result of a bad white balance! You can adjust the white balance either by selecting a "preset" (adapted to a certain light environment), or manually.
 Examples of "bad" white balances.
✅ Histograms
The histogram is extremely useful. Use it to check the exposure of an image to make sure that it is neither too dark nor too light.Although a little scary and convoluted at first glance, this graph is actually quite simple to read. Displaying the histogram of an image is usually child's play, and can be done with a single button.
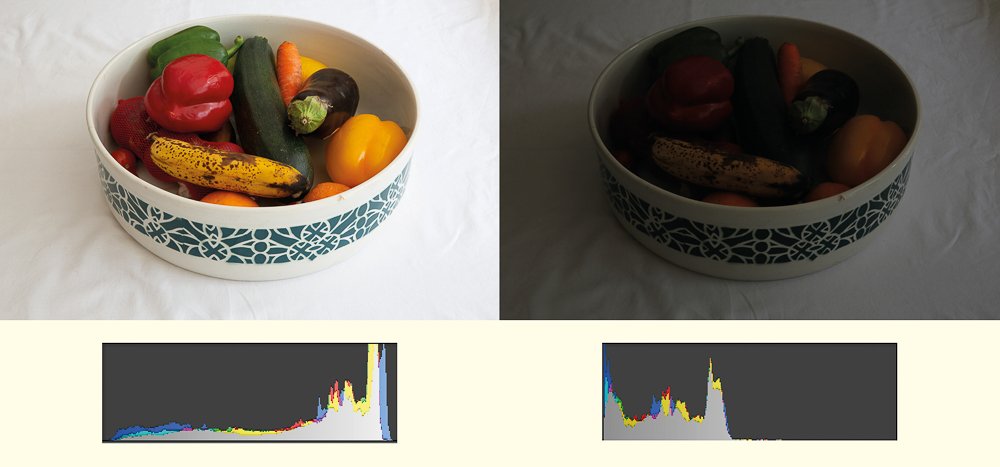 The histograms of a correctly exposed image and an image that is too dark.
✅ The P mode
When looking at your camera for the first time, you can't miss the different shooting modes: manual, A/Av, S/Tv, and the P mode. This last mode is best suited for a beginner wishing to get out of automatic. It allows one to manually control the sensitivity (expressed in ISO), whilst the camera automatically decides the aperture value and the speed.Did that sound like complete gibberish? Don't worry, we'll come back to the aperture and speed later!
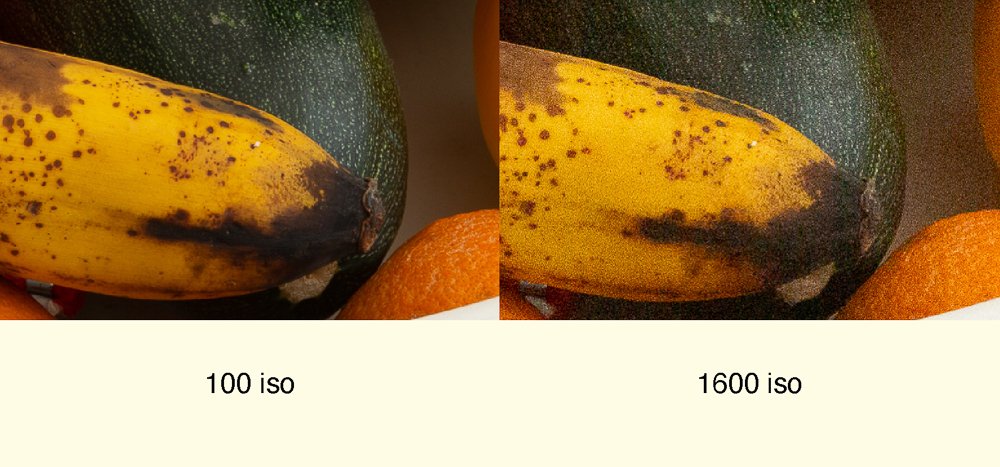 Increasing sensitivity causes "digital noise" to appear.
Check out our courses!
There’s still a lot to learn when it comes to your camera.
To step up your knowledge, check out our photography course
Camera Settings
What a Photograph
Landscape.
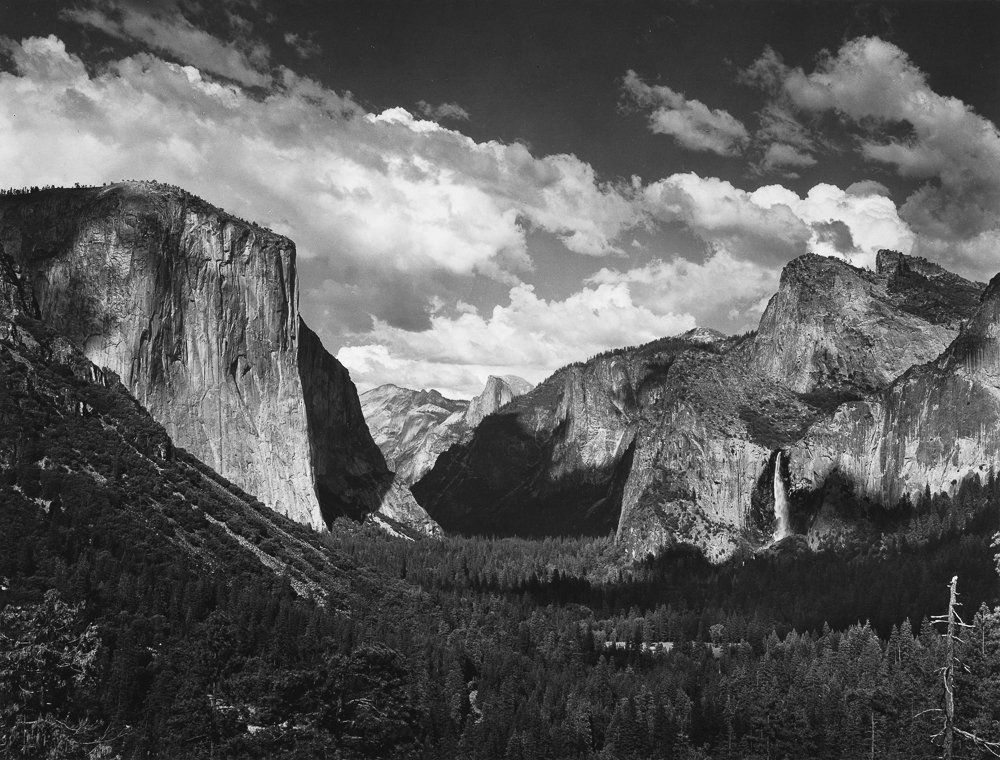 Yosemite Valley, 1934 © Ansel Adams
Ansel Adams is without doubt one of the most famous landscape photographers. He was a fervent environmentalist who wanted to capture the wild beauty of nature and encourage the general public to protect it.
Portrait.
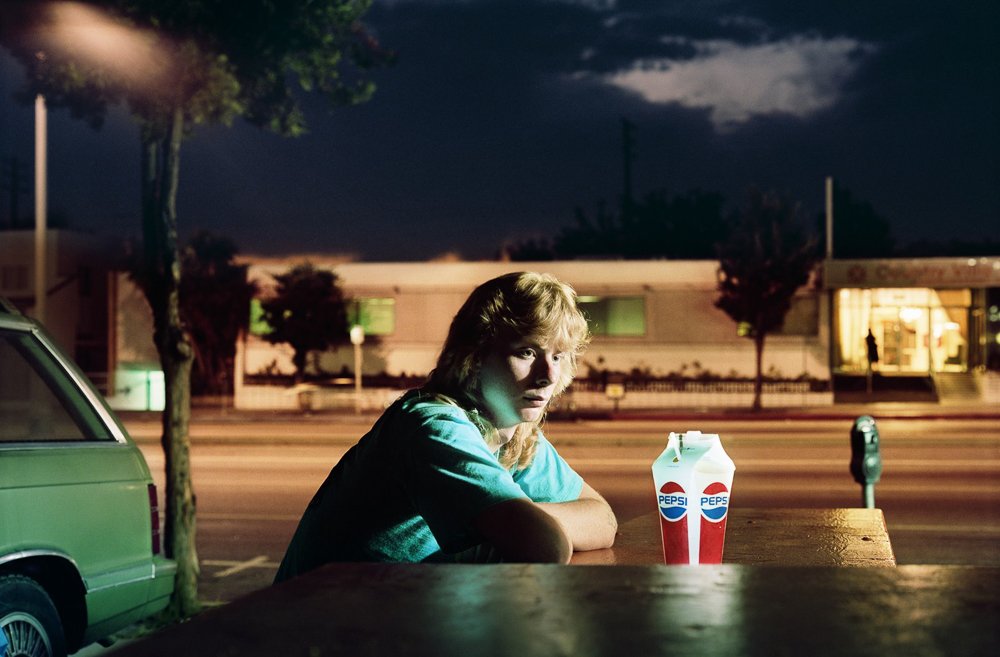 Brent Booth, 21 years old, Des Moines, Iowa, $30, circa 1991 © Philip Lorca
diCorcia
Brent Booth, 21 years old, Des Moines, Iowa, $30, circa 1991 © Philip Lorca
diCorciaPhilip Lorca diCorcia is an American photographer, born in 1953 in Connecticut. He is considered one of the most brilliant portrait photographers of his generation. His photographs combine elements of the documentary style with those of the fictional image.
diCorcia used to pay his models, often met by chance on the street. Thanks to the title of this photograph, we learn that Brent Booth was paid $30.
Architecture.
 Silber-Gelatine Abzüge, 1965-1992 © Bernd and Hilla Becher
In the early 1960s, the photography couple Bernd and Hilla Becher began a rigorous architectural inventory of European industrial buildings.
They documented the functional constructions of industrial sites objectively and head-on: silos, mine shafts, blast furnaces, gasometers and water towers.
Street Photography.
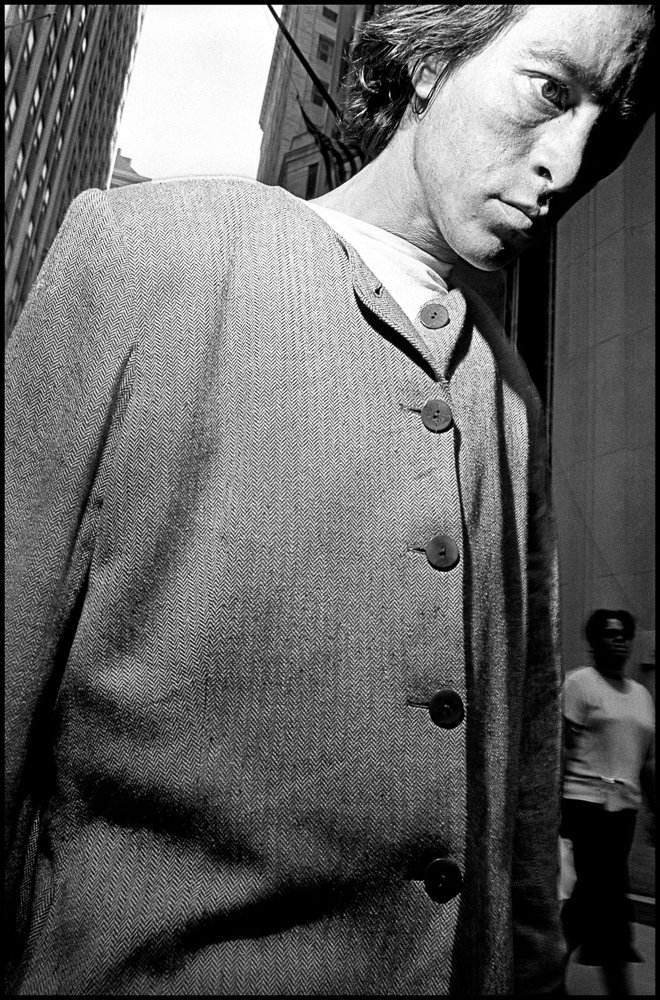 USA, New York City, Man walking in Wall Street area. September 18th, 2001. © Bruce Gilden
/ Magnum Photos
USA, New York City, Man walking in Wall Street area. September 18th, 2001. © Bruce Gilden
/ Magnum PhotosBruce Gilden is certainly one of the greatest representatives of street photography.
Without even a word, and at less than two metres from his subject, he freezes his characters with a big flash.
Shutter speed and movement
Like aperture and sensitivity, shutter speed affects the exposure of an image by bringing more or less light to the sensor.
The shutter controls the passage of light, and remains open for the necessary amount of time for a good exposure of the image. While only a few fractions of a second will be needed to expose an image of a bright subject, several seconds (or even minutes) will be required for a dark subject.
Here are some examples of images whose aesthetics depend mainly on the shutter speed used:
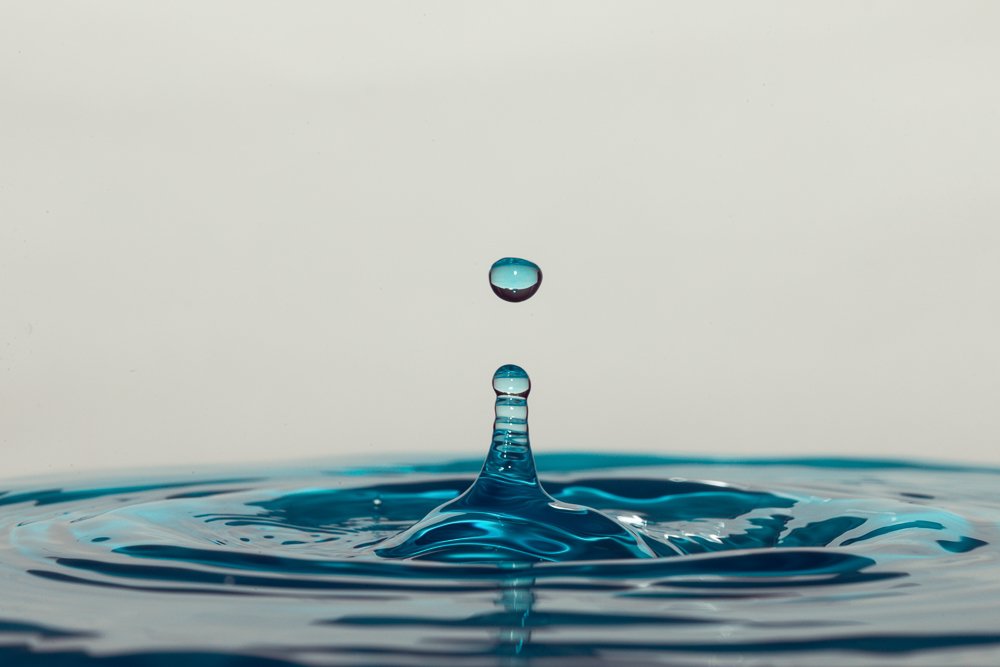 To freeze a drop of water in suspension, a fast shutter speed is required.
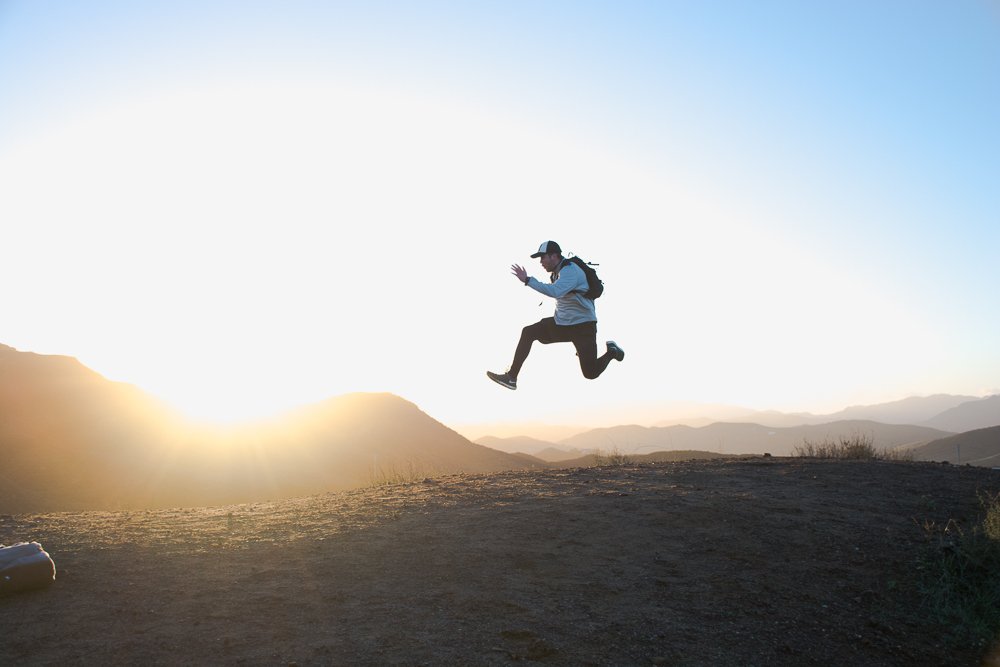 To capture the subject in focus, a fast speed was used.
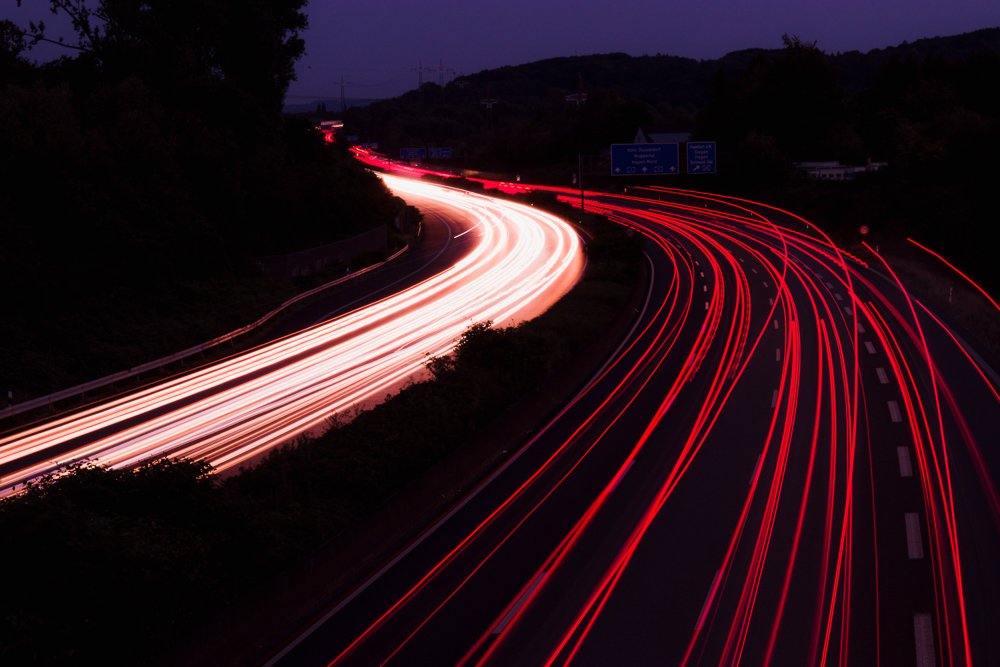 It takes several seconds to record the trails left by car headlights.
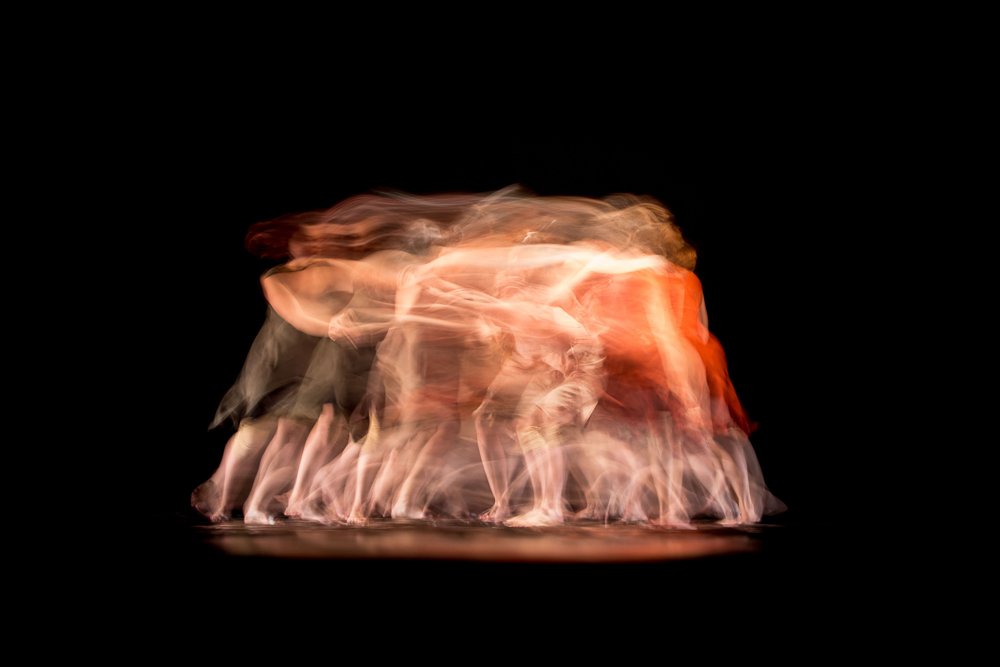 The shutter was left open for a few seconds to create this effect.
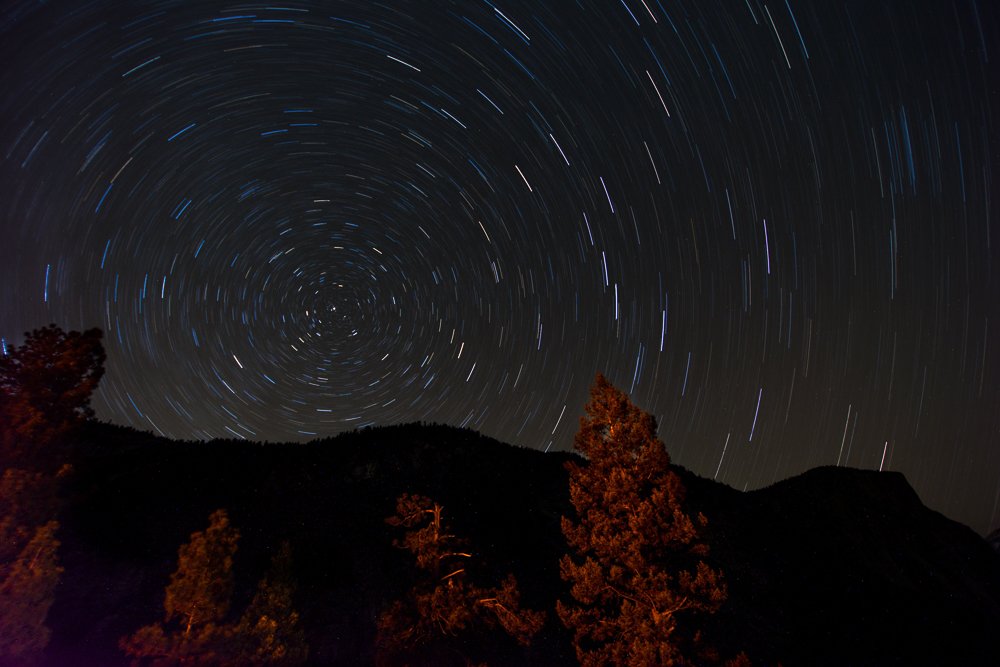 To capture the rotation of the earth, a shutter speed of a few minutes may be
sufficient.
If you want to try slow or fast speed shooting, you will need to use the "speed priority"
mode (S or Tv mode). You can then choose speeds ranging from 1/8000 of a second to 30
seconds!
Check out our courses!
There’s so much more to explore! Take a look at our photography course Shutter Speed and Movement
Aperture and depth of field
To understand how aperture works and how it affects an image, let's look at the human body, specifically our eyes. Hopefully you remember some high-school biology, because we are about to get a little scientific!
The pupil of our eye has the capacity to reduce or increase its aperture to let more or less light through to our retina. The "pupillary reflex" allows our eye to regulate the influx of light to either limit glare or maximise our perception in a dark environment.
When it comes to photography, the aperture works in the same way as our pupil. Effectively, a part called the diaphragm can vary its aperture to control the amount of light reaching the sensor (photosensitive surface - which records the light). Therefore, the aperture is a crucial parameter in image exposure.
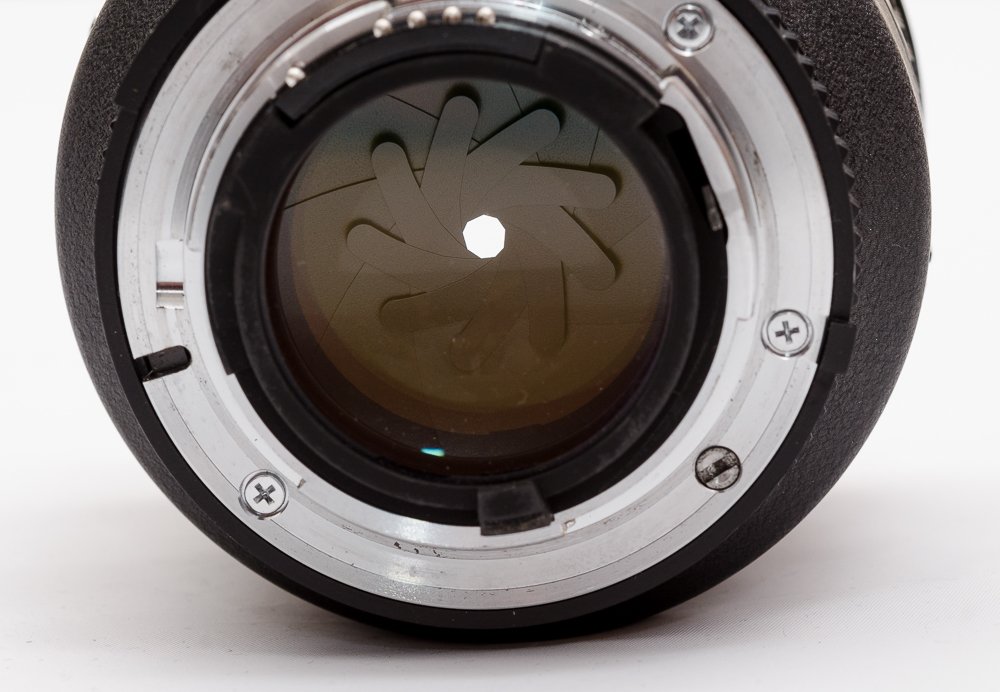 The diaphragm of a lens; small blades are used to open or reduce the aperture.
But what about the depth of field?
Well, the variation of the aperture will also lead to a change in the depth of field. In other words, the plane of sharpness will be more or less deep, and the blur outside this plane will be more or less pronounced. Have a look at the images below to see what we mean.
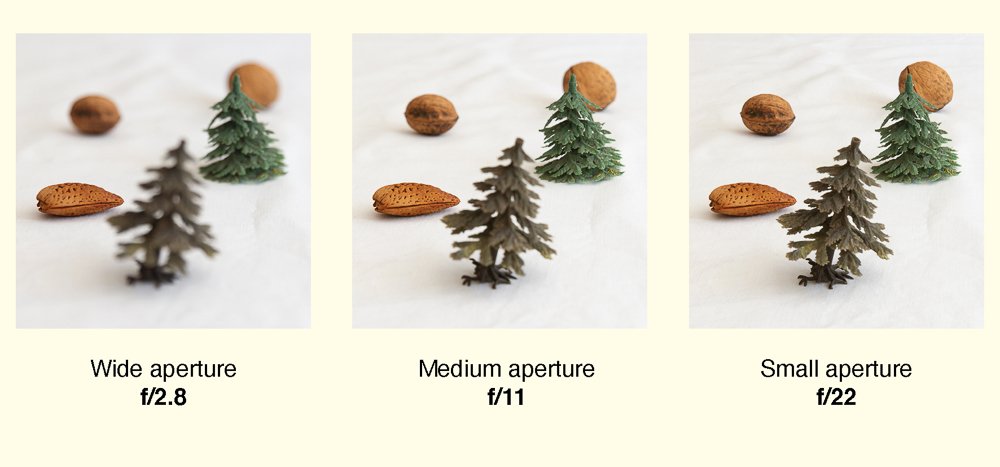 The smaller the aperture, the greater the depth of field.
Check out our courses!
Want to learn more about this crucial subject? One of our photography course dives into it in much more detail Aperture and Depth of Field
Continue your photography journey with The Photo Academy today!
At The Photo Academy, we have lots of options for our students who want to explore and experiment. Professional teachers will help you develop as a photographer and boost your skills in crucial areas. Take a look at all of our photography courses if you want to improve your photography quickly and easily! In addition to the technical side, we also teach the history of photography and the influential photographers that shaped genres over the decades. Knowing the history of photography as well as studying famous photographers will broaden your knowledge, inspire you and ultimately improve your photography.
