Photography classes for beginners near me
How to find beginner photography classes near me?
Most of us like to take pictures during important events or fun times with friends and family. But for some, photography isn't just a way to capture great memories, it's an activity, a job, and even an art form.
While it's fun to take pictures, learning the more complex techniques of photography can be intimidating for beginners. There is a lot to learn about camera equipment, proper settings and lighting, and much more. That's why photography courses are a great way to take your skills to the next level.
Photography classes can cover just about any subject. Whether you just want to hone your general knowledge or want to shoot something more specific, like a wedding, the right course can help you take fantastic photos.
Such courses are offered at local colleges and universities, community centers, adult education centers, camera stores, and city programs. Classes can range from one day a week to intensive 20-hour programs. It all depends on your desire and the level of skill you want to master. Also, classes usually tell you what kind of camera you need to bring with you - a digital "point-and-shoot" or a more sophisticated single-lens reflex camera with manual settings.
There are many ways to find good photography courses for beginners. In addition to searching online, you can go to local schools that have after-school courses, or find out if your city offers courses, often through the parks and recreation department.
In this article, we'll tell you how to find photography courses for beginners in your town. We will also learn how you can use the Internet to improve your photography knowledge.
How do I find the closest photography courses for beginners? A Google search is a great way to get started. You can find courses offered at local schools and camera stores. Keep in mind that each course is different, so the types of skills taught at certain levels may vary from place to place.
Even if you have some photography experience, it's not unreasonable to start with a beginner's course that teaches the basics:
- Photography Techniques
- Photography terms
- Camera settings
- Proper exposure
- Depth of field Some courses may also teach you how to transfer photos to a computer and email them.
Intermediate courses give an introduction to more advanced techniques:
- Image composition
- Flash and lighting
- Indoor photography
- Thinking like a photographer
Finally, advanced photography courses can help you turn your hobby into a business. The skills taught in these classes include techniques for professionals: How to shoot models Shooting in the dark Shooting at different speeds Advanced photo editing techniques If you've already acquired the skills, classes at this level can be a great investment.
Find a photography course that's right for you
Taking a specialized course can help you learn the best techniques for capturing nature. Your camera can capture everything from breathtaking sunsets to events on a soccer field - but as a photographer, you need to know how best to capture them. First, decide on the subject that interests you. Then, you can find a local or online course that will teach you how to take photos on that subject.
Some courses specialize in teaching photographers how to photograph weddings. When it comes to photographing a wedding, you only have one chance to succeed, so good preparation is very important. This means learning how to work with couples and their families, finding the right locations, using different lenses for the various events of the day and not interfering with the celebrations during the session.
If you are more interested in nature photography, check out nature photography classes. These classes teach you about natural light, choosing the right equipment, focusing and metering, and how to safely observe wildlife without disturbing them.
Want to get back to basics? You can sign up for a black and white photography course. To make the experience even more authentic, you can use a traditional film camera instead of a digital camera. These classes will teach you how to see the world in black and white, how to use contrast, light and shadow, and how to print and develop your photos. By learning how to photograph properly in black and white, you will give your photos a classic and artistic look. Specialized courses cover many more topics, so find out what interests you and see what you and your camera are capable of.
Find online photography courses for adults
The internet has become an incredible resource for aspiring photographers. There are many websites and online videos that can help you learn a lot about proper camera settings and shooting techniques. Taking online classes is a great option if you don't have time to attend in-person classes or if you live in an area where classes aren't easy to find.
First of all, websites such as Online Photography.net offer many informative articles, videos and products that you can purchase to improve your photography skills. The advantage of these sites is that their resources are completely free. You can get tips from professional photographers, such as what filter to use to capture great sunsets and how to properly use an aperture camera.
Tips and informative articles are great, but they don't always compare to actual training. Several websites offer actual photography classes where the student works with an instructor, practice assignments and receive feedback on their work. You can check out the "our courses" tab to see a list of the courses we offer.
Other sites even offer courses designed to turn your photography into a business. Want to create stock photos or take portraits of high school students? Perfect Picture Photography School offers courses in these areas and teaches skills that will help you improve your skills in the "digital darkroom," where you use computer software to make your images look their best.
Once you have taken the required courses, there is a great community of blogs and online forums where you and other photographers can discuss and share ideas. This is a great way to get support and discuss ways to further improve your photography.
If you would like to learn more about photography classes, visit our website for more information.
How do I choose the best photography classes near me
So you decide to become a photographer, you buy a camera, you start taking pictures, and you realize that something is wrong and you can't find the "masterpiece" button. Your photos are either bright, dark, blurry, or maybe everything is fine but they don't quite "capture" the atmosphere. It's time to dive into the books, learn the science of photography and choose photography classes for beginners.
In this article, you will learn: The methods of teaching photography and their advantages and disadvantages. How to choose a photography school or photography courses. And finally, how to learn something by taking a course, and translating that knowledge into a skill. So: Methods of learning photography.
- Self-education.
This is the most common and affordable method. You find the sources of information (articles and videos) you need to answer the questions you have. This method is suitable for those who grab everything on the fly, watch, read, try and learn. But it's about structuring information, separating the important from the unimportant, and finally, the most important problem - self-organization. Without proper self-control and motivation, such training usually drags on for years, its effectiveness is not very high, because there is no thoughtful plan, and the information is sought as the questions arise. I would not recommend it for basic photography training; as a beginner, drowning in information could make you lose all enthusiasm before learning anything. More experienced photographers often use it because they know exactly what they need.
- Photo schools.
In the case of photography schools or photography courses, you entrust your training to specialized institutions and take the classes in person. The undeniable advantage of this method is that these institutions have a program that gives you all the information you need. You attend the classes personally, where the teacher can show you and tell you what to do, where it is, etc. You study in a group of like-minded people and aspiring photographers like yourself. Some schools have off-site practical sessions, on the street and in the studio. One downside: you can't check in advance if the information is clear and understandable. Photographic education is not free and prices vary. This is both a disadvantage and an advantage. The upside is the extra motivation for the money spent, the minus is that not everyone is willing to shell out this money, especially after buying an expensive camera. Another important negative is that, depending on the schedule, the course can be spread over several months (1-2 sessions per week), which certainly reduces its effectiveness, because by the next session most of the previous information is forgotten. The disadvantage can also be the insufficient competence of the teacher (especially in cheap photography schools).
- Online photography courses.
Online photography courses can be interactive, with the possibility of remote communication with the teacher (curator), as well as in the form of step-by-step tutorials. The advantage of this method is that when you purchase the course, you get structured information. These courses are cheaper than photography schools, do not require your personal attendance at classes, save you time and also allow you to teach photography to people in small towns and villages, where there is no photography school. You can familiarize yourself with how the information is presented before you purchase the course, as the tutors often produce video tutorials and free articles. They present the information step by step and in a clear way, if you forget something you can review it (in the case of the DVD course), in the case of learning with a teacher, your homework is checked and you get feedback, just like in photography schools. Another advantage is the speed of study, you can choose your own pace, which increases the efficiency of learning. The disadvantages are self-management - laziness or procrastination can interfere with the learning process, but the money spent on buying the course will be an added incentive.
Rules of good portrait photography
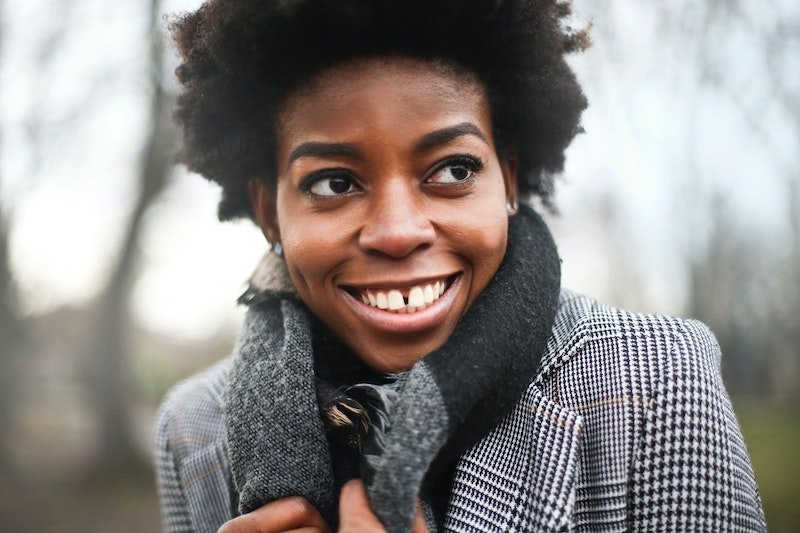
Every beginner photographer wants to learn how to photograph a portrait because portrait photography is one of the most common and sought-after genres of photography. Knowing how to take great portrait photos is useful for both amateur photographers who only photograph friends and relatives, and professionals who take good portraits for a lot of money. Today's article is about how to take a portrait. There will be basic recommendations on the settings and composition of such a photo.
Camera settings for portraits
One of the nice features of portrait photography is the presence of a nice blurred background in the frame, which helps to emphasize the beauty of the model. To achieve a blurred background, or bokeh, you need to open the lens to its maximum. The width of the aperture depends entirely on the specifications of the lens you are working with. For example, fast lenses are called fast because they allow you to capture the maximum amount of light by opening the aperture.
You can control the aperture in either semi-automatic aperture-priority mode or manual mode. If you are operating in aperture priority mode, setting the aperture value manually will automatically adjust the shutter speed. When you set the aperture value in manual mode, you also set the shutter speed yourself.
To set the shutter speed for a given aperture value in manual mode, a light meter must be used. Modern cameras have a built-in exposure meter that works automatically in automatic modes. If you set it manually, you will need to know and become familiar with the exposure meter, or you will have to make random adjustments.
For ease of adjustment, we recommend you remember this rule. On a sunny day, with an aperture of f/16, a shutter speed of 1/100th of a second is optimal. When you decrease the aperture by one step, you increase the shutter speed by one step. If you need to take pictures on a cloudy day or in low light, this rule doesn't work and the f/16 = 1/100 sec. ratio is wrong, so you need to adjust the values for the conditions. Before you start taking bursts, make sure the settings are correct by taking a few test shots.
When shooting group portraits, you don't want to set the aperture to the maximum, because you may not get all the members of the portrait to stand out clearly. It's best to set the aperture to f/4.5- f/6 so that the background isn't too bright and you can get a good shot of the people in the picture.
The focus should be on the subject's eyes. If the camera automatically focuses on your nose, forehead or lips, focus manually. The focal point is the sharpest part of the image and the eyes must be the most expressive and sharp.
How to take a portrait? Composition
When it comes to portrait composition, you will use the same classic rules of composition, namely the rule of thirds and the golden ratio. In addition, you have a lot of room for creativity and experimentation. Be sure to try different poses.
Experiment with angles and props
Also, your beautiful portraits make the correct and harmonious combination of colors in the clothes. The colors should not only be "in the face of the model", but also match each other.
How to learn videography and why you should do it
Video is the new black, red, yellow, blue, and every single color you can think of. People are consuming more films, clips, and animations than ever before. In fact, over three-quarters of all internet traffic comes from video. Over one billion hours of video are watched on YouTube every day. There are more than eight billion video views per day on Facebook. Instagram has launched IGTV, which allows users to share videos up to one hour long. The popularity of video is stretching across all platforms and industries.
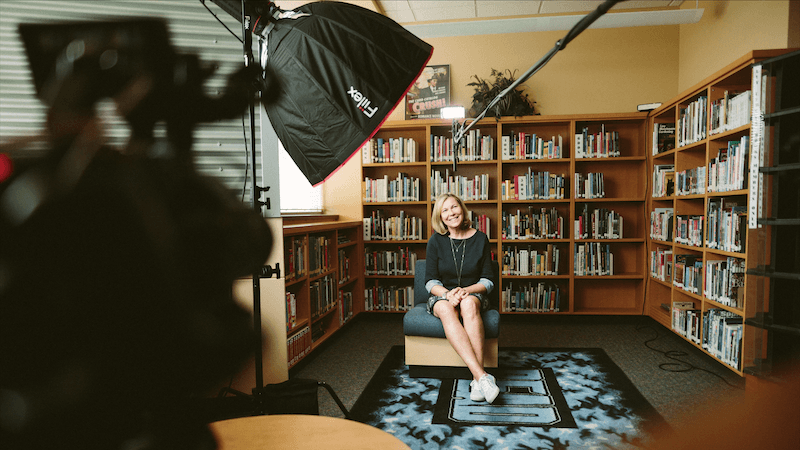
But how does that affect you, a photographer with little to no experience in shooting video? Funny enough, it impacts every inch of your photography business. From the potential of your skills and services to the reach of your photography website and social media platforms, there’s so much that can be improved with video. If you are still not convinced, here are 7 reasons why all photographers should delve into videography:
Stay on top of trends
There is no doubt that videography has become a huge trend in the industry, for both photographers and clients alike. Understanding what your audience is interested in is a must to improve your work’s exposure. This is why you should strive to identify new trends as soon as possible. Unlike popular belief, staying on top of trends does not mean you need to sell out to each of them. Instead, examine the individual characteristics of the trend and see which parts your work can benefit from.
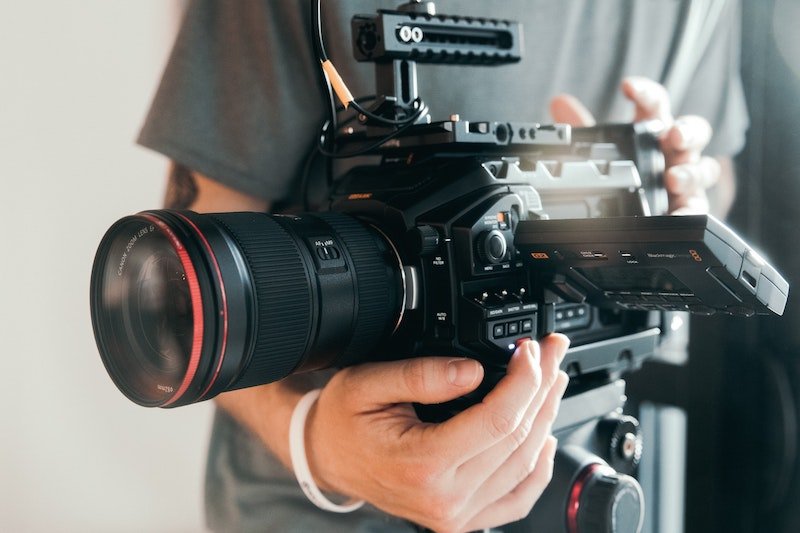
Typically, trends go hand in hand with increased online exposure. This is not only because people are actively looking for this type of content, but because platforms actively push its reach. Take the new Instagram algorithm as an example, which seems to reward users who try new features and share content that engages viewers for longer periods of time.
Challenge yourself
Comfort is a creative mind’s worst enemy. It’s so easy to stick to what you know, but how much can you actually learn if you never challenge yourself? If we had to pick a sole reason why all photographers should start shooting video, this is it.
Learning a whole new creative process has unmeasurable benefits that will be evidently reflected in your work. Creating videos will challenge the way you see the world, as you move from a static to a dynamic perspective. This will push you to reinvent how you plan every scene and compose each shot. You’ll also find yourself planning sessions in a whole new manner, and even post-processing the footage will take some newfound knowledge.
Improve your technical skills
The capabilities that you can gain from shooting videos are not limited to creativity. Once you start using your gear for new purposes, you’ll discover many features that you had never paid attention to before. You will also take your existing technical skills to the next level as you see them applied to a whole new environment.
For example, you will see how shutter speed affects objects you want to capture in movement. Your manual focusing skills will improve dramatically, as you won’t be able to rely on autofocus when shooting video. And let’s not even get started on how much you will learn about audio.
Share your expertise
One of the biggest opportunities the Internet offers to photographers is the ability to become experts in their field. Sharing your knowledge with the community will allow you to build a loyal audience that’s deeply invested in your work. The best way to share this knowledge? You guessed it: video.
Whether you choose to publish behind the scenes footages, create tutorials, or engage in Q&A sessions, video will play an essential role in this process. In order to make the most out of this opportunity, you will need to capture high-quality footage that stays in sync with your brand. These videos should provide an added value to your work, which will only happen if your audience can feel that you put enough effort behind it. You can easily include this content in your portfolio with Wix Video and sync it with your YouTube and Facebook channels.
Enhance your portfolio
Motion has raised as one of the biggest photography website design trends of the year. Adding videos to your online portfolio can have a huge impact on how visitors perceive your work. People perceive photographers and videographers as two entirely different professionals, and those brave enough to blur this line are seen as next-level creatives.
Start by using video on your homepage, or adding a few short clips within your main gallery. Even subtle changes like these will have a significant impact on how visitors react to your website. In fact, making little changes every so often can result in a better engagement rate than redesigning your whole site every other year. In essence, you don’t need to do a lot to see quick results.
Offer more
This one is quite obvious. The more you know, the more you’ll be able to offer. Expanding your photography services page will allow you to cater to a wider audience and grow your customer base. On top of that, including video as part of your service offering will give you a significant advantage over other photographers.
For example, let’s say someone is looking for a newborn photographer and finds two whose work they love. If one of them can create a video of their baby in addition to a photo session, that one will most likely be the chosen one. Even if there is a price tag difference when it comes to preserving memories people tend to pay more attention to the end product rather than the cost of it.
Because, why not? You already have all the gear and a passion for capturing your personal view of the world. Why not give video a shot? There are no downsides to trying, but so much to benefit from. See it as a new tool to play with and learn more about media creation, rather than just another trend you should know about.
Don’t feel pressured to start providing video services as soon as possible. In fact, it shouldn’t be part of your offering until the quality of your videos is as high as that of your photos. Doing so before being ready just because you don’t want to be late to the video party will only compromise the value of your brand.
Learning how to use light is the key to good photography
Understanding light is one of the most important skills in any kind of photography: film, digital, or smartphone.
It doesn’t matter how advanced and expensive your camera and lens are if you don’t really have a grasp of the different types of natural light, and how to harness these for your images, you’ll always be at a disadvantage. Fortunately, prolific photographer, author and long-time ‘Learning with Experts’ tutor, Michael Freeman, has written one of the best books on understanding light I have seen in a long time. The book is called ‘Light & How to Photograph It: The Professional Approach to Capturing Every Type of Light’ and is available now.
What I like about the book is its adroit mix of theory and practice, and there are lots of wonderful example images from Michael’s long and storied career – this guy knows what he is talking about. However, it’s not some narrow or abstruse photographic treatise with lots of technical jargon; Michael does a great job of busting jargon like ‘raking light’ or ‘hard light,’ and I love the way he also refers to how the great painters used light for creative effect. There are lots of really useful diagrams and the book is not at all text-heavy or cumbersome.
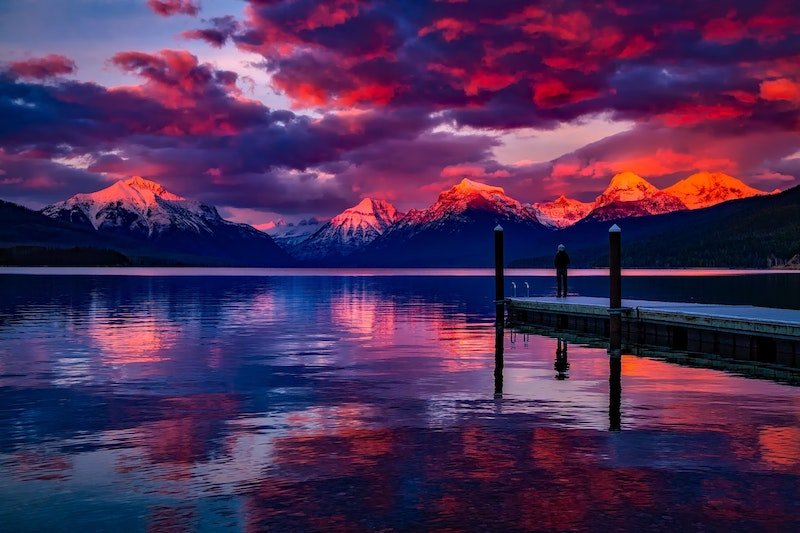
Here are some of the key take-home lessons from ‘Light & How to Photograph It’.
The art of waiting “Practically, as a photographer, I divide light into the kind of light I can expect and the kinds that take me by surprise.” Michael’s point here is that there is the light you can plan for (there are lots of tools and apps such as Helios to help with this) and then there is the wonderful light that serendipitously comes to you – a sudden shaft of sunlight as a storm lets up, for instance. So yes, you need to be able to plan, but also to know your camera well enough to grab the moment as it unfolds.
Shades of grey One of the biggest lessons I have learned from Michael’s books is to appreciate what many of us dismiss as grey or flat light. Many conventional landscape photographers will hang up their camera when the sky becomes a solid mass of grey, but as Michael shows, it can be a wonderful time to shoot a garden, for example – the sky acts like a giant diffuser, and harsh shadows and contrast can be smoothed out. As he mentions, however, it’s best to avoid grey sky in the images, as it does look boring, unless that is the effect you are seeking. Rain, even drizzle, can be a great way of adding atmosphere too, particularly with travel.
Hard facts Another old chestnut is ‘avoid shooting in the middle of the day,’ as hard light/strong sunlight can create brutal shadows. Michael shows how high sun can actually be really useful when making images with strong graphic shapes, such as those found with buildings; some of his shots from Mexico and California, for example, show how “geometrical abstraction is arguably what hard light does best.” Hard light can also be harnessed effectively by black and white photographers – see the work of Australian photographer Trent Parke for a great example of this.
The Rake’s progress ‘Raking light’ is another commonly used term in photography, but it’s not just about the angle that light comes in. As Michael explains, “you see raking light when the light source is sharp and pinpoint (like the sun on a clear day) and glancing across a surface that has some kind of delicate relief.” So again, Micheal shows how we can use raking light to our advantage, particularly in architectural, travel and landscape photography – it can literally ‘sharpen’ the landscape.
Let it snow Snow, according to Michael, is the ultimate reflector. The book explains how, with a cloudless snowy scene, there is much less of a sense of light coming down onto a scene from above, but that objects in the landscape receive a lot of bounced reflection from below.
Shooting into the sun As Michal explains, shooting into the sun carries its share of technical problems, because of the huge range between the sun’s disc and the foreground shadows. While a lot of digital photographers steer clear of shooting into the sun because of these challenges, Michael explains how careful exposure and editing can solve a lot of the headaches – particularly if you shoot in Raw, rather than JPEG. He also covers the basics of editing images for HDR (high dynamic range).
As the book progresses, you learn in detail about other highly prized types of lighting conditions for photography, such as the golden hour (when the sun rises or sets), the blue hour (the dark blue sky of dusk before night fully sets in) and so on. He also does a great job of explaining more advanced concepts such as Directional Light and Fall Off. Light and How to Photograph It is one of the most useful photography books I have seen this year, and could totally transform your photography. Highly recommended.
Digital or film photography – an easy guide for beginners
In this article, we're going to talk about how film photography differs from digital, and why I love film photography so much.
Let's start by defining the purely technical nuances:
Shooting digitally is shooting on professional digital cameras. Such photos require subsequent processing and retouching. Shooting on film is shooting on cameras with photographic film, which is developed and digitized in a professional laboratory or at home (if there is special equipment).
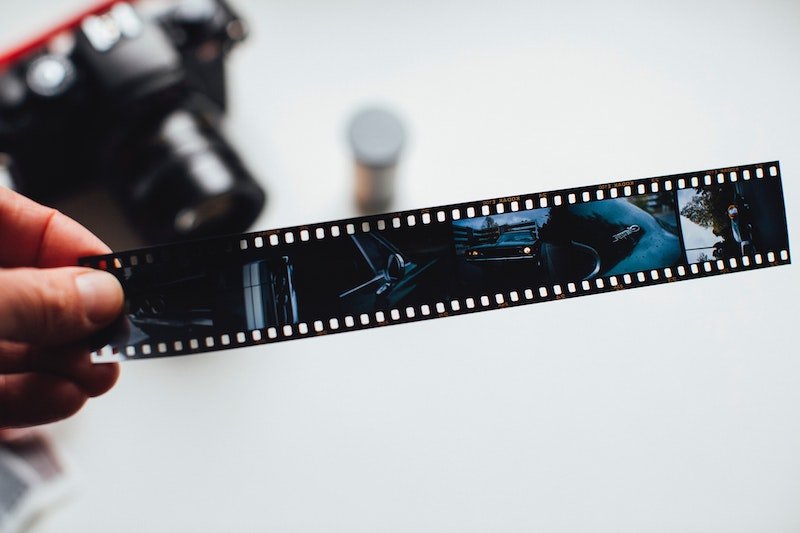
Film photography fascinated me with its color and airiness. Digital doesn't do that with volume and light. On the other hand, digital is powerful for reportage photography, where it is important to capture the moment, emotion and dynamics. That's why I combined these two tools in my work. That is how I arrived at my fine art style.
I wrote a big article about this style, but will also briefly say a few words about it here. Fine art is a style of photography as close as possible to painting. With a natural, elegant and soft image, the emphasis is on portraits of people and details. Artistic value is present in every frame. And it is film that helps to achieve such high aesthetic characteristics.
With time I learned how to "match" the digital with the film through processing. This is necessary to get an organic result to minimize the differences when you view the entire shot or print it in an album. It's not enough to just apply a purchased preset for "film-like" processing. Such rough work won't give the softness, color, or air that is inherent in film. I've done a lot of experimentation, bringing the processing of digital frames to film frames taken in the same location and under the same light conditions. Using film as a reference, I've studied the peculiarities of the film picture, tried different processing settings, and trained my color perception. As a result, sometimes it's up to me to distinguish between a film frame and a digital one. But as I see it, film images always get the most rave reviews, likes and comments.
Why is film photography making a comeback? Is it a trend or just nostalgia? Fuji did a study and found that among the fans of film photography there are more people born in the digital age who definitely can't feel nostalgic. Their interest is related to aesthetic taste. Film photos create the mood of something vintage and elite and evoke a sense of emotive art. "It's like a frame from a movie" is a common comparison that comes to mind when you look at a film photograph. What is the secret?
THE PROS OF FILM
Productivity
You can shoot 1000 pictures on a digital camera, and only 20% of them will be good. With film it's up to 70-100%. I have a family photoshoot where I shot 100% of my family with film.
Film encourages you to think about every shot in detail. You become the director and control the dynamics to get the picture you want. You think about poses, angles, light and shadow, taking into account all possible factors that affect the result. At the moment of taking a shot, the photographer thinks and feels at the same time. Automatism is turned off and lively creativity begins. Film is a constant growth of a photographer as an artist.
Light
When we take pictures against the sun on a digital camera we either lose the subject (it falls in the dark), or we get a white over-lit background. Film gives us more options, allowing us to draw out details in both shadows and highlights. We get a more airy picture precisely because of the way film picks up light.
Grain
Why can't Photoshop rendered noise be compared to real film grain? The point is that grain has volume, while digital noise is composed of pixels (two-dimensional, volume-deprived squares). The grain appears as a result of applying photo emulsion with silver halide crystals to the film. These crystals have different shapes and sizes. They are randomly positioned and cover the entire surface of the frame in an even layer. In this chaotic dance, there is no room for technical order, as in the case of pixels. Digital noise is undeniably inferior in aesthetics to the unique "pattern" of the film grain. Many people try to reproduce the grain with Photoshop, but it is simply not technically possible. As in the case of film color, it can only be approximated.
As a result, the grain gives a unique volume to the photo. In addition, a film picture is always softer and gentler than a digital picture. There will never be an inappropriate ringing sharpness. Pictures will always be more artistic and natural.
Saturated and natural color
We will always see richer and more expressive colors in a film picture. Digital doesn't have that capability. It's not even the saturation and brightness itself, but the fact that film distinguishes far more colors than technology. There are chemical processes at work here, not electronics.
That's the magic that makes it possible to convey natural skin color and smooth sharpness. That's why film portraits are so mesmerizing.
Disadvantages of film
There's really only one disadvantage: the price. A single piece of film will cost you $1.50 on average. But it's the price that creates value. After all, you think several times before you press the shutter button. Each shot becomes unique and unrepeatable, with its own atmosphere.
Film and digital complement each other perfectly when shooting weddings. Film gives an artistic and pastel picture, and digital allows you to bring dynamics to the reportage. Experience has shown that once you've tried a film camera, you'll go back to film more than once.
Learning how to use light is the key to good photography Lighting is almost the main factor in photography, and that's what we're going to talk about today. Light in photography is very much dependent on the shooting conditions, and you can't ignore them in your work.
What do you need to know about your surroundings to get a good shot in any situation?
Background type and color
The surroundings of the main subject can be reflective, for example. There are a lot of examples of this type: snow, all kinds of sand, light walls, ponds, rocks... When working in such an environment, remember that the depth of shadows and contrasts will inevitably weaken. A colored reflective surface has an interesting effect: it gives a slight tint to the subject. Here's a tip: keep that in mind and use it to your advantage.
You can get a good shot if the sun's rays fall directly on a reflective surface (a rock, wall, etc.) and the subject is in the shade. Make sure it's the reflected light that illuminates it, and it's a done deal.
The other type of surrounding surface is the one that absorbs light, the dark one. It enhances contrasts and makes shadows clearer. And also such a background reduces the level of light in the photo. Sometimes you can take advantage of it. Just change the direction of light in the frame and you will get a completely different impression. It might look cloudy in one shot, but be a little bit sunny in another.
Sometimes they use special black panels for nature photography. You can use them to adjust the direction of light because they selectively absorb light. And if you use both absorbing and reflecting panels at the same time, you can get a very convenient system of light control in photography.
It just depends on the size of the panels: the bigger they are, the bigger the shooting area that you can artificially influence by your own idea.
The effect of contrast
Imagine a street with whitewashed walls or a light rocky massif. This is a general reflective environment, and the contrast is low. This kind of background is very convenient for the photographer. You can get a lot of good shots without being afraid of direct sunlight. In other situations, the sunlight is tricky and can easily ruin your photo, but not in this case.
Take your subjects in the shade, so that they are exposed to reflected light (we mentioned that a moment ago). Now you need to take exposure measurements in the shade and in the light and compare the readings. You need the level of shadow illumination to be about 10% of the value obtained on the light - in this case, the camera will be able to fix the image in detail, without loss.
By the way, you can take a picture of your hand or shirt sleeve for this test, because it is not the absolute readings that are important, but only their ratio. If it turns out that the illumination in the shade is less than in full light by three exposure steps, it is worth resorting to the help of reflectors or placing the model a little closer to the background surface. These simple techniques will help to subdue light in photography, as well as help to realize your needs and develop your creative vision.
However, if the difference is 4 or 5 exposure steps, the shots will, alas, turn out unsatisfactory. At such a level of illumination dark areas will appear on the photo with fuzzy details, and only fully illuminated parts of the subject will be captured without distortion. You can try to improve the situation by increasing exposure, but in this case, the colors will become unexpressive and whitened. Unfortunately, such pictures will not be successful either.
Luckily, on cloudy and windy days, the weather can be very helpful. Clouds move very quickly, either blocking or revealing the sun.
So if you're shooting a landscape in those conditions, find the angle you want and wait for the light to change - it probably won't take long at all.
Natural "reflectors" and "absorbers" and their effect on light in photography Conditions in nature are astonishingly fickle. The weather and the time of day are constantly changing, summer is changing to autumn, and so on. And that's good for photographers: think of all the wonderful opportunities and chances you'll get! It's breathtaking. However, there are a few universal factors in all this diversity, and you need to be aware of them.
First of all, we will talk about colossal natural reflectors. They can dramatically change daylighting: both its contrast and direction. There are four such powerful reflectors in nature: sand, snow, water and clouds.
The sand space is a weak, scattering reflector. The coloring of the sand can vary: yellow, white, beige, and a host of shades. Whatever the overhead light, the shadows in the sand appear illuminated. Also, this reflector gives the portrait a warm hue, and this can be used successfully if you're working in cool bluish lighting.
- The beauty of snow as a reflector is that it doesn't stain the light - it's pure white. That's why snow is considered the most effective and neutral reflective surface. But it has a big disadvantage - on a cloudless day the blue sky is too obviously reflected by the snow. You might want to use filters or adjust your camera settings to keep the light from getting too cold.
- A pond is a rather whimsical surface. Water can reflect light only when it falls at an angle of fewer than 42 degrees. Another precondition is that the water surface must be between the sun and your subject. For the water to look like a mirror it must be completely calm. If ripples or waves appear on the surface of the body of water, this will immediately change the effect of reflection.
- Clouds. They have a double function. Sometimes clouds work as big light diffusers. But under certain conditions, they can also play the role of reflectors - when they turn their side to the sun. By the way, this happens quite often, because clouds have an impressive height. Think of snow-white cumulus clouds that look like mountains. They look white because the natural light of the sun is reflected from their surface, not absorbed by it. Like snow, clouds don't stain the light. And unlike snow, they reflect the white rays of the sun, not the blue sky. That's why the clouds in the frame do a good job of over blueness.
Capture your subject against a blue sky with huge clouds, and your pictures will have nice contrast and distinct colors. This is probably one of the easiest ways to achieve harmony in your photography.
Now let's talk about natural light absorbers. The strongest of these is the bare earth. Second place can be given to dense coniferous plants and dark-colored stones. Water also sometimes absorbs light. This requires placing the subject between the water surface and the sun. Artificial absorbers are also found. These include tunnels black from time and wooden buildings that have been treated with creosote.
Natural sources of light.
The main and most obvious of these is direct sunlight. But besides this, there are as many as four varieties of natural light, which we are not accustomed to distinguishing. We simply call this ‘overcast’. Photographers would of course benefit from knowing more about what these types are and how to work with them - considering how important light is in photography!
Let's name additional types of natural light: light from the sky, light in heavy cloud cover, diffused light and directional light in cloudy conditions. Each of them has a different effect on the final result of the photoshoot.
- We see light from the sky when the sun is tightly covered by a cloud, while in general, the day is cloudless. This light is dim and diffuse. Photographs in this light take on a bluish hue, and objects appear shapeless and less three-dimensional. That is why it is better not to take pictures in such conditions.
- The light when it's cloudy (when the sky is monochromatic and it's hard to tell where the sun is) is a little more favorable for the photographer. The sky is gray rather than blue, so it doesn't give the pictures a distinctly cold hue. Sometimes, when there are gaps between the clouds, the light can acquire directionality and emphasize the volume of the subject. When setting up your camera before work, keep in mind that the light is always weak on a cloudy day.
- Stray light is very similar to the previous type in that the shadows of objects on the ground are almost invisible. However, there is an important difference: you can easily find the sun in a bright spot among the clouds. This type of light is very beneficial in photography. It is bright enough and adds a slight "warm" touch to the frames. The outlines and the plasticity of the objects are preserved without distortion. So it is a great option for nature photography, especially when you shoot close-ups. There are two reasons for diffuse light: cloud cover and haze. The first is only possible during the day, provided that the layer of clouds is solid but quite thin. Then slanted sunlight passes through the clouds, scattering and partially absorbed. Haze, on the other hand, occurs usually in the early morning or at sunset, and only rarely can it be observed during the day.
- Directional light in cloudy conditions is an unpredictable phenomenon. It can be observed when the cloud layer is too heterogeneous and disordered. For example, in one place thin low clouds are clustered, through which the sun shines incredibly brightly, and nearby we see completely black areas: in them, the clouds do not let the light pass at all. This is often the case during thunderstorms, in strong winds and storms. Often this heterogeneous lighting is observed on sea coasts, where the wind constantly brings the clouds of different shapes and thicknesses. In photography, directional light opens up unlimited possibilities for the operator. This light can fall at any angle, and the cloud pattern itself can be very, very different.
In addition, it is often combined with other spectacular phenomena, like rainbows, rain, thunder and lightning (I wrote about them here, by the way). It is very difficult to work in such unpredictable conditions. But the result is definitely worth it.
Other factors
Successful photography doesn't just depend on the type of lighting and the nature of the background. It turns out that there are areas that are great for photography, and there are points on the map that professionals are trying to avoid. Nobody gives universal recommendations, but let's try to consider some examples of how terrain affects light in photography.
The west coasts of North America, Great Britain, Europe and Scandinavia lead in the peculiar ranking of favorable places for photography. They are good in any season because they have the right orientation in relation to the sun.
The sun goes down over the ocean in those areas, and you can go out every night to "hunt" for a beautiful sunset (don't forget to bring a wonderful thing called a tripod). It's much more convenient than trying to catch the sunrise on the East Coast - it's too unpredictable.
In addition, the geographical and climatic conditions of the named areas are very favorable for shooting. The only restriction: you should not shoot in Florida and the Mediterranean coast in July and August, because during those months the heat and humidity spoil the natural light.
For seasonal shooting in the fall and spring, it is a good idea to go to Canada, Scotland, the Caucasus, the Alps, or Scandinavia. In these regions and countries, the weather in the off-season changes quickly, the air is clean, and the plants are striking in color. As a result, you will get juicy and unusual shots.
Tropical and subtropical regions are ideal for shooting in the fall, winter and spring seasons, but should be avoided in the summer. The exception is areas where monsoons occur during the summer months (Southeast Asia). At the beginning and end of the rainy season, you can get interesting pictures through unusual lighting.
To finish talking about light in photography, I'll tell you about the unfavorable places in this regard. Urban areas with dense buildings and polluted atmospheres are not good for taking pictures, especially in the winter. A layer of smoke hangs over the cities, which partially absorbs the light and disturbs the overall picture of the winter landscape.
Pictures might not be as colorful and clear as you want them to be. So choose the locations and the type of lighting, use black and reflective panels and make sure your camera settings are correct.
Private photography classes - pros and cons
Often, especially for beginners, the question arises: What form of photography training should I choose? Individual training with a teacher or lessons in a group? All forms of learning have both advantages and disadvantages. Here is my opinion on the matter:
The advantages of individual classes in drawing, painting and composition: The student is given much more attention. When the work is done, mistakes and shortcomings are identified by the teacher immediately as the work is being done, thus avoiding the formation of an incorrect skill. The teacher can consider the student's level and personal characteristics much better when conducting the class. In a group class, the focus is usually on those students whose level is average or slightly above average. If a student falls ill or misses a class, it is very difficult for them to get back into the rhythm of the group. Not only do they fall behind, but after a break, it takes time to regain what they have learned. The perception of the teacher's speech by students has the following peculiarity. The words of the teacher addressed to the student personally, are remembered much better, sometimes for life. Words addressed to the group are not so memorized by many students because they perceive them as addressed to other students, but not to the student himself.
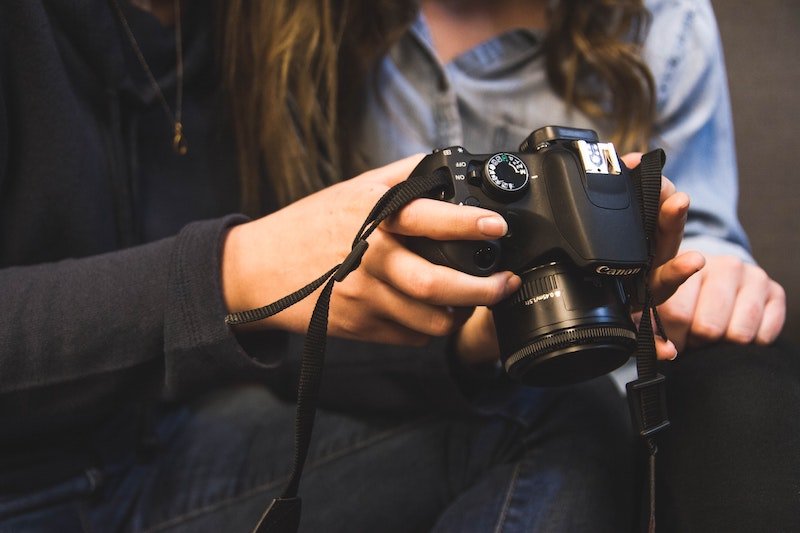
The efficiency of individual lessons is much higher. The teacher can perfect every step of the student's learning, which makes the quality of the skills he or she learns much better. Much less time is needed to achieve a certain level of skills and a certain amount of knowledge. Lessons are held according to the individual schedule: one can change the starting time of the lesson or come at a convenient time, taking into account changed circumstances. The frequency of classes is also chosen individually 1 or 2 times a week, or 3-4 times a week for intensive preparation for the art school.
Disadvantages of individual classes:
The cost of 1 hour of classes is a bit higher than in a group. But the high efficiency justifies the cost. In some cases, the pupil loses their independence: without a teacher, they are not able to perform their tasks. This situation can be corrected: it is necessary to systematically perform independent work at home. The advantages of studying in a group: The student sees the result of other students' work, if they learn to compare, to see what others do better and learn to do the same, it is only beneficial. If the group creates a competitive atmosphere, the student's desire to do the best drawing is the strongest incentive to learn.
The disadvantages of group lessons:
If the work is poorly organized, much time is wasted on idle conversations between students. For a task that can be done in 3 hours, in such conditions it sometimes takes 10-12 hours. It is difficult, and in a group of more than 10 people, it is practically impossible to have an individual approach to teaching. Teaching fine arts in groups of more than 15 people becomes ineffective. Considerably less attention is paid to each student. In a group of 10 people, the teacher comes to the class at best 2-3 times. I don't consider this kind of "teaching" when the teacher puts on a performance and leaves to "drink tea" and then comes back at the end of the class to be teaching, although it often happens... In a group class, one moves on to the next stage of teaching when a significant portion of the group has mastered the previous stage of teaching well. And this is at best. Often the training in the group is conducted according to a formalized program, and the complition of tasks occurs according to the schedule, as a result, the quality of training is low.
Students who fall behind the group lose confidence in their abilities. A common reason for falling behind is not a lack of ability, but the fact that much was missed in previous stages of learning and needs to be made up for. Some students, due to their individual characteristics, acquire knowledge and skills more slowly than others. When they do not do well, the student loses interest in the class, the teacher sees that the student is not trying and stops paying the proper attention to them. There are students in the group who are trying hard, and working with them is more interesting to the teacher and as a result, pays more attention to them. It's a vicious circle, that causes the lagging pupils to lose faith in their ability to learn drawing and painting well and, later, to achieve great results in art. Tuition is paid at once for a long period of time. It is not uncommon to pay for six months of training. It turns out a large sum. Sometimes it happens that the money for the missed tuition, even for a good reason (illness), is not refunded. Paying tuition in advance for a long period of time makes the student a hostage of sorts. Which class to choose is a personal matter for everyone. Both forms of training have their strengths and weaknesses. At the initial stage of training in drawing and painting, I see more effective individual training.
How to learn videography and why you should do it
Video is the new medium for storytelling. And it's not going away anytime soon. Every year people consume more and more videos. YouTube is updated daily with new content, and video is increasingly shared and consumed on social media. While photography will never go away, video has become an important addition to it. To better prepare your business for future success, add video services to what you offer your customers. Here are a few reasons why you should consider acquiring video skills.
Video is popular on all platforms
As mentioned above, video is what people are consuming in the moment. If you're not giving people what they want, they may ignore you and your services. Likewise, if you share your company's content online, it probably won't reach as many people as you would like. Since video is at the height of popularity right now, social media encourages users who share videos with more favorable algorithms. Text or photographic content is not rated as highly by these services. In order for your followers to see all of your content, you need to include video.
This will help you improve your current skills and learn new ones. Mastering new skills shows your clients that you are willing to evolve and stay relevant. Learning how to shoot and edit videos will also challenge you creatively. Looking at your subjects through the lens of a video camera will help you see things in a new way and inspire you with new techniques for capturing moments and emotions. Video is different from photography in many ways. Mastering a new skill like video can help you become a better photographer.
Diversify your business
People booking events hire photographers and videographers. If you can provide both of these services, you give your business an incredible boost. You save your clients from having to hire someone else to do the event. Of course, there are certain logistical limitations on how you can take pictures and shoot video at the same time. But you can always hire an assistant to help you shoot the event. Mastering this new skill will help you get more bookings, as some people no longer use photographers and turn exclusively to video.
Promote your business on social media platforms or on your website. You can practice your video skills by presenting your business. For those who visit your site, you can create exclusive behind-the-scenes footage of the preparation for a photoshoot or your thought process when editing, etc. You can then capture these shots and share them on your social media accounts. Then you can take those shots and share them on your social media. It's a great way to show off yourself and learn new skills at the same time.
You can even apply this principle to another situation and create a YouTube channel. You can make videos of yourself teaching skills related to your profession and upload them to your channel. This gives you the opportunity to share video content and practice shooting and editing videos. You also have the opportunity to monetize your content on YouTube. It's a win-win situation for everyone!
Take these tips, learn a new skill, and watch your business explode! Who doesn't want the opportunity to learn a new skill that can help grow their business?
Weekend photography classes for busy people
If you have always wanted to study photography, but keep putting it off due to lack of time, then do not despair. Some classes last only a few hours but bring incredible results and you can visit them on the weekend. But where can I find weekend classes near me? It's easy peasy- our site provides courses in many cities or even online if you want to save time. Our weekend photography classes are perfect for even the busiest of people as they only last 3.5 hours.
And if you want to speed up the process even more, we offer private photography classes near you. Private photography classes last from one to two hours and all the teacher's time will be devoted solely to you, thus speeding up the learning process and concentrating on the aspects that are right for you.
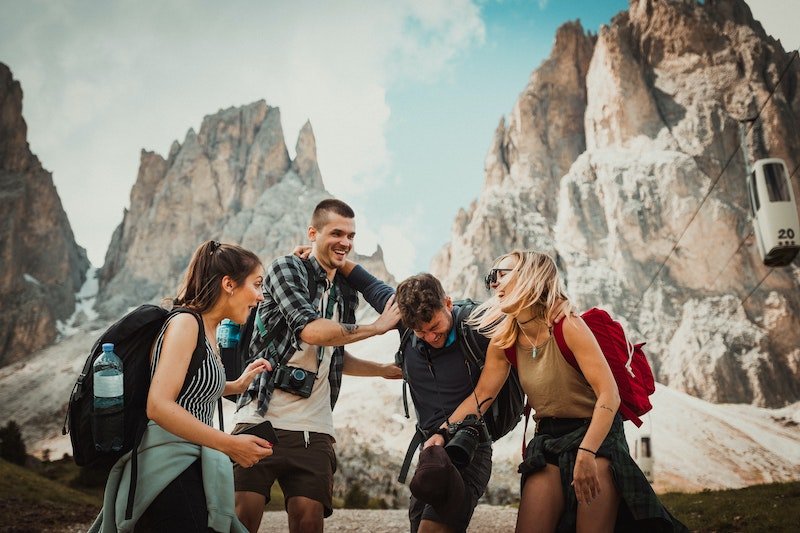
Weekends are a great opportunity to spend some time on your hobby and get an immediate improvement in your abilities. Weekend photography classes are not just boring lessons, but also a good time in the company of creative people. Some of our students even continue to communicate and share photos on social networks in the future.
Recreational photography classes – a fun activity for creative people Taking up photography as a hobby can be very rewarding, inspiring and relaxing. Regardless of your equipment or camera, you have the potential to become a great photographer. Even a smartphone camera is enough!
Here are some reasons why including photography in your list of hobbies is a great idea.
Photography will help you capture memories
Being able to use a camera in any situation is a superpower. You can use this ability to document your life and take beautiful pictures anywhere. The more you work on these skills, the better you will get. You can think of this as a constant cycle of personal development. Be sure to experiment with many genres. You can start with landscape, macro, portrait and street photography. The more skills you develop, the more confident you will feel.
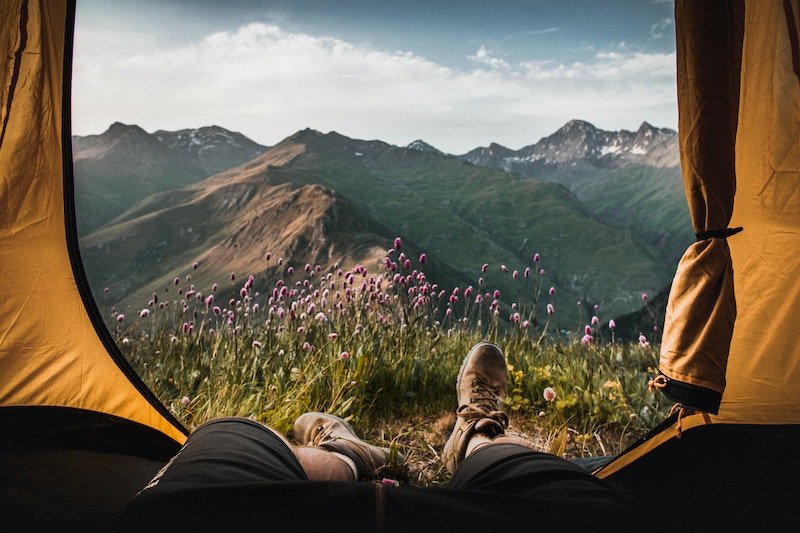
Taking pictures for yourself is de-stressing
While a photography career has its perks, it can also be stressful. If you take pictures just for yourself, you can enjoy the wonders of photography without worrying about money. All in all, photography as a hobby can be a great source of comfort, especially if you do it alone. Going for a walk to take landscape photos, for example, will allow you to breathe fresh air and get closer to nature. Taking pictures with friends will allow you to socialize and be creative at the same time. When you're taking photos, you can't look at your Instagram feed or answer emails. Your camera forces you to be present and focus solely on your creative side. This is one of the best ways to refresh your mind and get rid of stress.
You can express yourself in a new way
Each art form has its own benefits. Even if you are already an artist or enjoy working on craft projects, you will definitely discover something new about photography. Photography as a hobby can be instantly satisfying, especially if you find the perfect moment to capture it. Depending on the genre you choose, it can present you with many challenges. Macro photography, for example, can help you spot more beauty in the details.
You can connect with a whole new world of people.
The photography community is large and diverse. There are Facebook groups, Instagram pages, and international photographers' meetups. If you're a complete beginner, you might benefit from joining a special group for aspiring portrait photographers, for example. You can also talk to your favorite photographers and ask them for advice if you feel lost. Being part of a group can help you feel useful, supported and involved. It can also help you overcome creative blocks and feel more comfortable with the idea of putting your work online.
Taking pictures can inspire you to get out more.
Spending more time outside for yourself is rarely a bad idea. Regardless of what you decide to photograph, you will probably need to go outside for a shoot. You may have a specific place you want to shoot, a friend you'd like to do a photoshoot with or some other motivation. Photography as a hobby can bring more joy to your life. You will become more active, more creative and more knowledgeable about photography. You will also be more aware of what is going on outside of your normal routine.
You will be a lifelong learner in photography.
There are many experienced photographers, but there is always room for improvement. You will always discover new things to learn and understand about photography. It may be new photographic equipment or new shooting techniques. Being a lifelong student of photography does not mean taking tests your whole life. It means that no matter what you learn, there will always be something new to inspire and motivate you. This will inevitably make your journey in photography endless and exciting.
Photography skills can help you in other areas of life
You've probably already noticed that there's more to photography than just taking pictures with a camera. The more pictures you take, the more open and creative you will become. If you work in an office, photography can improve your communication with other people. It can also help you get through a boring day by taking a few pictures with your camera during your lunch break over a cup of coffee. It can also help you appreciate things you didn't notice before in your office. If your work is related to art, photography as a hobby can help you approach your work from a different angle. The techniques you learn can influence the way you design products, draw people, etc.
Photography will make you more curious
There are many inspiring photographers, techniques and ideas available online and offline. Once you become a photographer, you will have access to all of these. The more styles, documentaries and artists you discover, the more curious you will be. This curiosity will make you even more passionate about the art form. This can have significant effects in the long run. The more curious you are, the more creative opportunities you will find.
Your photos can make someone happy
Even as a hobby, photography can lift people's spirits and help them see things from a different perspective. Your photos can also inspire people to start taking pictures. This doesn't mean you have to take conceptual or controversial photos. If you are passionate about what you do, you are more likely to inspire someone. You can take it a step further by writing short captions for your photos. The caption can be an inspirational quote, a story about the shooting process, or a simple introduction. This will help you make deeper connections with other photography enthusiasts.
You can earn extra money by selling your photos online or by hosting photoshoots. A hobby should be relaxing and satisfying, so money is not a top priority for any hobbyist. However, you can earn some extra money if you have at least some experience in photography. You can sell your photos to stock photo agencies or individuals. This can increase your chances of being published in magazines or on book covers. If you are a portrait photographer, you can photograph couples and families for little money. If you like wedding photography, you can work as a second photographer (or assistant to the photographer). This will allow you to gain experience and earn money. Over time, you may find that you enjoy it more than taking pictures yourself. At this point, you might consider becoming a professional photographer.
Photography teaches you to see the potential in seemingly insignificant things. When you take pictures, you pay attention to composition, detail and other technical factors. These elements determine whether your photos will be boring or exceptional. By paying a lot of attention to things like framing, you reprogram your brain. The more you do this, the easier it will be for you to find interesting details in places that others don't pay attention to. Portrait photographer Kai Böttcher is a great example of someone who sees potential in props and places that may seem ugly at first glance. Most of his props are very inexpensive, although his photos suggest otherwise.
Your camera will be your companion for life
Inspiration may come and go and life may change completely, but you will always have your camera with you. Photography as a hobby is about capturing every part of your journey, no matter how small. Painting, drawing or sculpting are also great ways to express yourself, but photography is one of the fastest ways to capture something important. As long as your camera is with you wherever you go, it will be your companion for life.
No matter what your job is, where you live, or what kind of camera you have, you can enjoy photography as a hobby. If you are already interested, you can become a photographer at any time. Tap into your creative side and photograph what you like. You'll soon discover a whole new world of exciting possibilities.
