Am I making these common photography mistakes?
Are you making these mistakes? Let's find out.
Everyone makes mistakes. Even professional photographers with decades of experience will still slip up every now and then! It’s totally normal so don’t beat yourself up over it. Having said that, there are some mistakes that are easy to avoid once you’ve spotted them. If you are new to photography then knowing exactly what to do and what to avoid may feel daunting, but this simple guide will help you.
At The Photo Academy, we have pinpointed some of the most common mistakes our students make and what you can do to make sure you don’t fall into the same trap. We’ve also made these mistakes at some point, so we are speaking from experience! Whether you are a beginner or an experienced photographer, this list is definitely worth reading.
1-Not understanding your camera
Getting a new camera is exciting. Unboxing the model you’ve been waiting to buy for months is a one-of-a-kind feeling. But let’s be honest, no one reads the entire camera manual. It’s much more fun to get out and start shooting. However, for new photographers, all the settings and features will be seriously overwhelming and you may get frustrated when your results aren’t what you expected. Even a $10,000 camera is only as good as a smartphone if you stay in automatic mode! If you actually want to take great photos, the best place to begin is by understanding your camera. Invest some time into researching its functions and tools online, or better yet, sign up for our class ‘Camera settings for beginners’!
2-Out-of-focus photos
Who hasn’t taken a shot only to find the subject a blurry mess? It is so frustrating when this happens, but it is one of the most common mistakes photographers make. If your camera has an autofocus system, it is often better to use it, as opposed to manual focusing, which is far too imprecise because it depends on your visual acuity. It is always preferable to use a single collimator (a small cell used to focus) whenever possible. This will ensure that the camera selects the precise point you have chosen for focusing.

3-Bad Composition
Generally speaking, the subject should not be at the center of the image. There are times when this rule can be broken, but it’s much better to master the Rule of Thirds first. Keep the subject off-center so that there is an uneven amount of negative space in the image. You will find your photograph is far more interesting and captivating to look at!

4-Restricting your compositions
The Rule of Thirds isn’t the only composition you should keep in mind! It’s a good place to start but if you want to break the mold then experiment with these other key rules instead.
Leading lines- Allow natural lines to direct the viewer’s eye towards the subject. Diagonals- Diagonal lines help create movement in your photo even if the subject is stationary. Frame within a frame- Doors, windows, and holes all form a natural frame that can be used to create an interesting and enticing composition.
Have fun experimenting!
5-Boring subjects
We know art is subject to opinion, but sometimes photographs really are just boring. Instead of snapping away aimlessly, think about the subject you are photographing and spend time experimenting with composition or altering the scene. If a subject has been shot countless times, see if you can find a creative new angle or introduce dramatic lighting. For example, there are countless images of the Leaning Tower of Pisa, the Grand Canyon, or the Pyramids of Giza all taken from the same angle and with the same composition. To get some fresh ideas, look at the work of photographers Martin Parr (Global Tourism series), and Thomas Struth (Museum Photographs series) who take the opposite view of clichés.
Ultimately, your ability to spot an interesting subject and come up with creative ideas will develop the more time you dedicate to your art.

6-Ignoring the background
Picture this- you’ve found the perfect flower, one that will complete your nature photography series. So you line up the shot and snap the photo, pleased with your find. However, when you look through the images at home, you realize that you were so focused on the one flower, you didn’t pay attention to the background. Wild grass and dozens of different colored flowers are also in focus, distracting the viewer from the subject. Sadly, the perfect flower is lost amongst the clutter of the background.
This is a classic error. Once the subject is chosen, remember to pay attention to everything around it! Make sure the background doesn’t contain clashing colors or any distracting details. If the background is too cluttered, blur it out so the subject stands out. Less is more in this case, so keep it simple!

7-Not focussing on the ambiance
Quality not quantity is an age-old saying, and as you become more experienced this will certainly ring true. It is far better to spend longer on a scene to capture the best lighting, weather conditions, and time of day, as all these details add emotion and ambiance to your image. If you don't want to dedicate a whole weekend to the perfect shot in the perfect conditions, just being cognizant of ISO and shutter speed will improve your photos drastically. Also being aware of what elements create a dramatic or interesting photograph; you are hardly going to get the same ambiance photographing a forest in the afternoon as at dusk.
8-Using the wrong lens
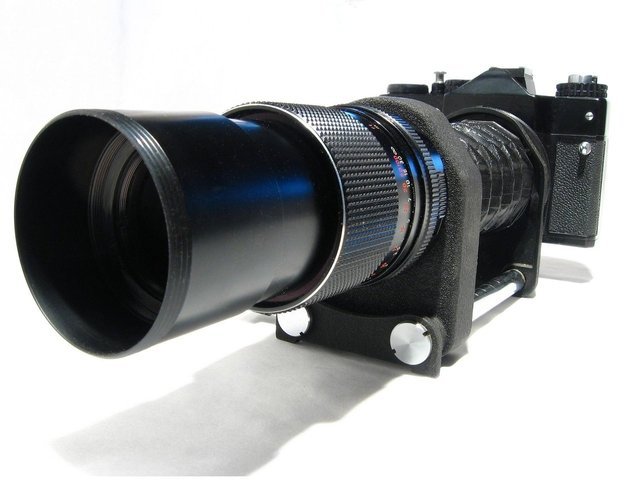
The lens is arguably the most important part of the camera. Without the right lens, you won’t be able to capture the right image. As a photographer, you should know what to look for in a lens and understand the 2 key properties: the focal point and maximum aperture.
Let's take a few examples of classic lenses to see what makes them special:
The famous 50mm f/1.8 (or f/1.4, f/1.2): This is a "fixed" lens, i.e. it does not allow optical zooming. Far from being a defect, the absence of zoom will lead the photographer to move in relation to their subject, and therefore to better explore the possibilities of composition. Secondly, the 50mm value indicates a certain angle of view, fairly tight but not too tight; perfect for portraiture or detail photography. Finally, the f/1.8 aperture represents its ability to capture a certain amount of light. An f/1.8 lens is particularly bright and will make it easier to take images in dark places.

A 24mm f/2.8 lens: This is a fixed lens, like the 50mm, but with a wider viewing angle. This lens is more suitable for landscape photography, or interior architecture. Note that its 2.8 aperture allows less light to be collected compared to the 50mm f/1.8.
A 24-70mm f/4 zoom lens: This lens allows you to optically zoom in to the scene (change the focal length), which is useful for moving from a wide shot to a tighter one without having to physically move. Note that its f/4 aperture does not allow you to harvest as much light as the lenses mentioned above.
A word of advice: Avoid using the lenses that come with entry-level or mid-range cameras (such as 17-55mm f/3.5-5.6), as these will always deliver poorer quality images compared to a fixed lens (such as 50mm f/1.8).
9-Prioritizing expensive equipment
It’s all too common for an amateur photographer to waste money on expensive gear they don’t necessarily need. Don’t splash out on top equipment straight away, as the chances are you probably won’t use it correctly and then get frustrated with the disappointing results. Instead, it is far better to spend your money on knowledge. Invest in some good photography books and classes before purchasing all the fancy stuff. Your money will go much further this way, trust us!
10-Shooting in JPEG instead of RAW
Novice photographers may have seen the option for shooting in RAW but not really understood its significance. Although the file sizes are much larger, and therefore you can’t fit nearly as many images on your memory card, the benefits of RAW far outweigh the negatives. RAW produces better quality images, with more detail and one has greater control when editing. You can finely tune the sharpness, noise, and white balance, far more than with JPEG. We recommend you switch to RAW straight away!
11-Not doing any editing
Let’s make one thing clear; editing is not cheating! Most photographs have had some editing work done to them. Whether that be cropping, adjusting the levels, or experimenting with different effects in Photoshop or Lightroom, it is totally normal to adjust the image in post. Editing software may seem daunting at first, so it’s worth taking a look at our online classes to get the hang of things. Check out our live online courses on Photoshop and Lightroom that will give you the confidence you need to fine-tune your images.
12-Over editing
On the other hand, getting too carried away whilst editing can have a similarly detrimental effect on your work. Over editing can lead to your images looking unnatural and amateurish. By all means, experiment with the software but know that a little can go a long way.

13-Over cropping
Cropping can be useful if you want to cut out unwanted elements on the edges of your image or to make sure that the horizon line is straight. However, be careful you don’t cut out all the negative space in your composition. Your subject needs room to breathe and move.
Another mistake is cropping an image in the wrong place. When taking portraits of people, don’t crop at the joints as it will make their limbs look amputated. Either include their whole arm, hand, fingers (same with legs, feet, and toes) or don’t include them at all. Similarly, don’t leave someone's head ‘floating’. A head attached to the shoulders looks much better!
14-Not backing up
Speaking from personal experience, this is a painful mistake! If you are a digital photographer, make sure you have an external hard drive to keep all your images safe. Few things are worse than losing or breaking your computer and having your work disappear forever. Many tears have been shed over this error!
15-Keeping your photos to yourself
Don’t be shy, show your photos to your friends and family! Or even upload them to Instagram. Receiving positive feedback on your work will build up your confidence and reaffirm what you are doing correctly. Alternatively, you may be surprised to find that the images others like the most don’t necessarily align with your choices. Posting your images to Internet boards and forums is another good way of getting honest feedback from other photographers which will help improve your work.
If you don’t share your work, there is little chance for you to grow as a photographer. Instagram is a good visual tool to utilize. If you regularly post, you will see the development of your skills over time and the emergence of a style. It’s a useful portfolio! If you need help with your social media page, then our live online course will be right up your street.
These are the most common mistakes that we’ve noticed photographers make. It’s totally fine to make an error now and then! Every mistake made is a lesson learned, even if it doesn’t feel that way at the time!
We hope that you found this guide useful and enlightened you as to why your images aren’t meeting your expectations. Keep these 15 things in mind when you are next out shooting and you are sure to see an improvement in no time at all!
Good luck!
