5 completely dispensable hacks for your Nikon
These 5 great hacks will brighten up your Sunday, or will manage to ruin your device. Check them out!
It is Sunday, the sky is grey, the weather is dragging on and time almost seems to be going backwards. The afternoon spreads out in front of you but there is nothing on the horizon, not even one of those soporific phone calls with the in-laws. You have never been so keen for some activity and entertainment... If you are precisely in the situation described above, the following article could put an end to your gloom, and who knows, maybe even bring you some fun!
I forgot: before continuing, make sure you have a Nikon interchangeable lens camera (DSLR, mirrorless).
HACK #1: Spice up your bokeh
For this hack, you will need to dig up the DIY skills you learnt back in your primary school art lessons.
You will need:
- Relatively thick black paper (200gr).
- An ordinary pencil.
- A pair of scissors.
- A shape cutter.
- Sticky tape (preferably black duct tape).
Then proceed with the following steps:
1- Make a cylinder with the black paper; make sure that its size corresponds to the diameter of the lens, so that it fits perfectly around it. 2- Then, cut out a circle with the same black paper and the same diameter as the tube previously made (or slightly larger). 3- Using a cutter or a special punch, cut out the shape of your choice (a heart, star, fir tree, etc.). 4- Attach the perforated circle to an opening in the cylinder with adhesive paper. 5- Insert the tube on the lens of your camera.
All you have to do is take a picture! Preferably choose an insulated light source (fairy lights, living room lamp, etc.), and above all, use the largest possible aperture of your lens.
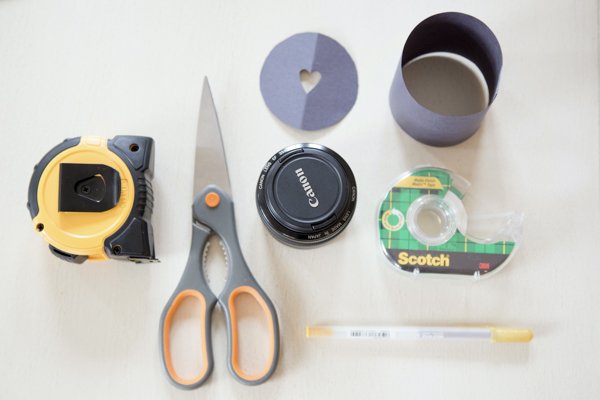
Image: blissfullydomestic.com

HACK #2: Thread a plastic bag over your lens
That's it. Doesn’t your camera look more classy now?!
But seriously, placing a clear plastic bag around your lens will add a hazy/blurred effect to the edges of your images.
For this hack, follow these steps scrupulously:
Get a transparent plastic bag. Put it anyway you want around your lens (see photos).
There you go. See, isn't this a fun Sunday?!
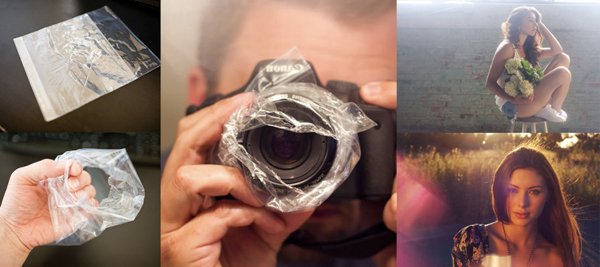
Image: Gomma Photography Magazine
HACK #3: No tripod at hand? Old jeans and lentils will do the trick!
This will be more of an alternative to the monopod than the tripod. While the tripod totally stabilises the camera, the monopod reduces shaking significantly whilst allowing the photographer good mobility.
In order to equip yourself with a stabilisation system at a lower cost, but still effective in reducing shaking, you will need:
- An old pair of jeans (or any other large piece of fabric, preferably thicker).
- A flock of lentils (or other dried beans, split peas, etc.).
- A pair of scissors.
- A sewing machine (or a hand sewing set; if you have a few hours to spare).
Then proceed as follows:
1- Cut a "mini short" out of your jeans (see photo). 2- Apply a seam on the top of the jeans, as well as on a leg. 3- Fill the jeans with lentils. 4- Close the bag by sewing up the open part. 5- Put the bag on the door of your car, and take a photo like a private detective (see photo).
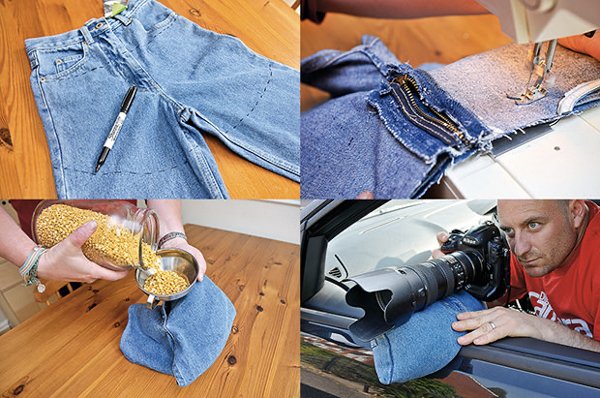
Image: Techradar
HACK #4: Turn your Nikon into a digital pinhole camera
The pinhole camera is a primitive camera, reduced only to the essential. In its analogical form, the pinhole comes in the form of a box with a hole in it, and a photosensitive support (facing the hole) is placed inside. When the rays of light penetrate through the hole in the box, they cross each other and project a reversed image onto the photosensitive support.
Images taken with a pinhole camera are very characteristic: often inaccurate, foggy, and with strong vignetting (darker edges of the image). This is the exact aesthetic that we will try to reproduce with our fourth hack!
The necessary equipment:
- A camera cap (the one that fits in place of a lens).
- A pair of scissors.
- A cutter.
- A sewing needle.
- Aluminium foil.
- Adhesive tape.
- Something to drill the hole in the plastic cap (a pair of sharp scissors or a drill with a very fine bit).
For the manufacturing itself, I recommend following the steps described on this page of digital-photography-school.com; it is extremely well explained!
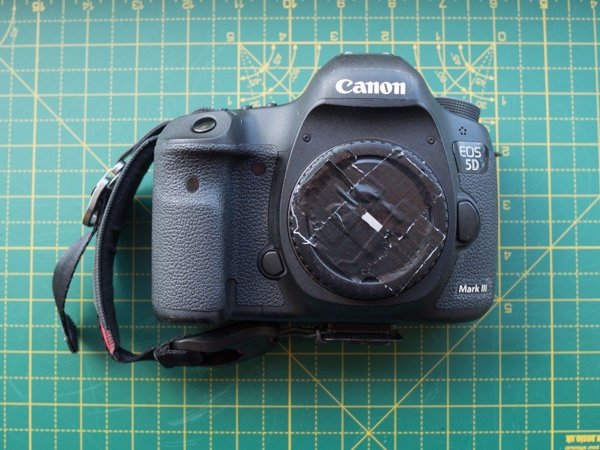
Image: DIY Photography
HACK #5: Your belt as a video stabiliser
If on this dull Sunday you are planning to smash your appliance on the floor, then this trick is for you! However, despite the real danger of this homemade stabiliser, the results are pretty effective!
What will you need to make this device?
- Your best belt.
- Some courage.
Fasten the belt around your case as tight as you can. There is no need to check whether the device is properly fastened, it is not. Film while holding the top of the strap; the camera will be suspended, and naturally your movements will be damped by this "pendulum" system.
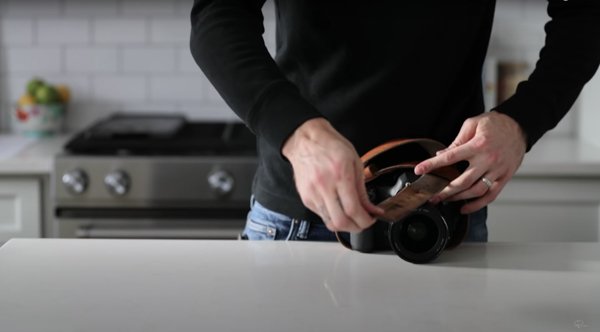
Image: Peter McKinnon
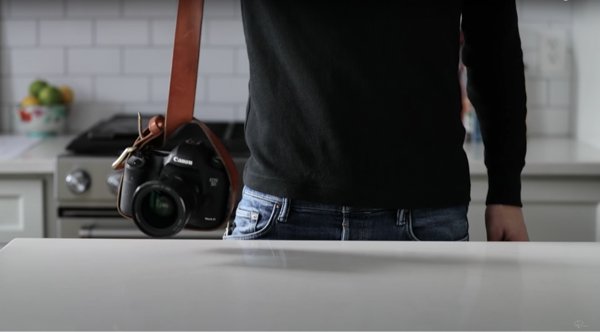
Image: Peter McKinnon
There you go!
If these 5 great hacks didn't brighten up your Sunday, or manage to screw up your device, please note that I take no responsibility.
Have a good Monday!
